
Welcome back to another step-by-step guide. Today we are presenting Microsoft Surface Pro 8 Speaker Replacement. We can’t deny that Microsoft provides us with the best devices that can work the best as a tablet and turn into a laptop amazingly. However it could be frustrating when any of the two speakers stops functioning well. But don’t worry! You can replace the speaker of the Surface Pro 8 while staying at your home after having this comprehensive guide.
However this step-by-step will not only help you with Microsoft Surface Pro 8 Speaker Replacement but also tell you some precautions and tips for making your task easier. So without wasting any time let's start Microsoft Surface Pro 8 Speaker Replacement.
How To Replace Surface Pro 8 Speaker
Before starting the guide to Replacement of surface Pro 8 Speaker we should know some pecuasion.
- Before beginning the speaker replacement on your Surface Pro 8 make sure its battery level is below 25%.
- Remember to remove the SSD from your Surface Pro 8 to prevent any potential damage during the speaker replacement process.
- When disassembling your Surface Pro 8 be sure to mark the opening pick correctly. Inserting an opening pick too deeply could cause harm to important parts and connections.
Gather All the Necessary Tools
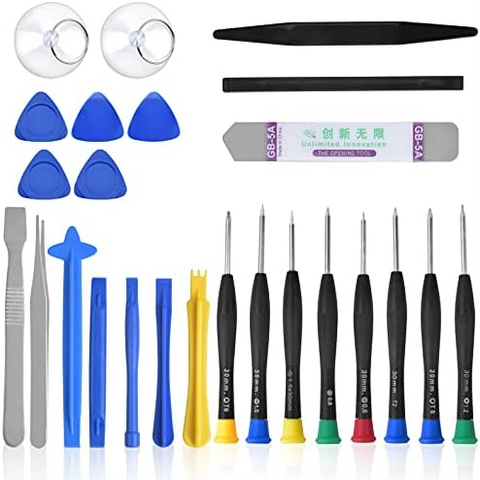
Another crucial thing is to make sure you have all the necessary tools prepared before starting. Here's a list of the tools you'll need.
- Plastic Spudger
- Suction Tool
- Tweezers
- 4 to 5 Opening Picks
- Screwdriver (3IP Torx-Plus)
- Metal Ruler
- Anti-static Wrist Strap (with 1 Mohm Resistance)
- Microfiber or Lint-Free Cloth
- Speaker Replacement Specifically Designed for Surface Pro 8 Tablet
- SIM eject tool (or a paperclip with a diameter of 0.023 in / 0.58 mm)
- Plastic tray or plate (for safe placement of screws and small components)
Having these tools readily available can simplify and smooth the process of replacing the Surface Pro 8 speaker.
Let’s Begin The Step By Step Guide To Surface Pro 8 Speaker Replacement
Please follow every instruction according to the steps. We also present pictorial illustrations to guide you with accuracy.
Step #1. Open The Kick Stand And Remove The SSD
- Make sure your Surface Pro 8 is powered off and resting face down on a soft surface.
- After turning off your device, make sure to remove the SSD from the Surface Pro 8 before starting any repairs. This will disconnect the battery and prevent damage to the tablet.
- Lift the kickstand to at least a 90° angle. So that it is perpendicular to the Surface Pro 8's screen. The further you open the hinge the easier it is to access the SSD and SIM card door.
Step #2. Open The SSD And SIM
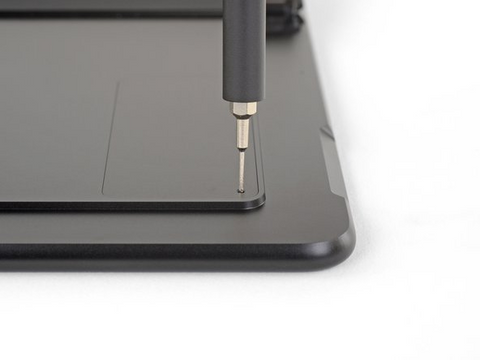
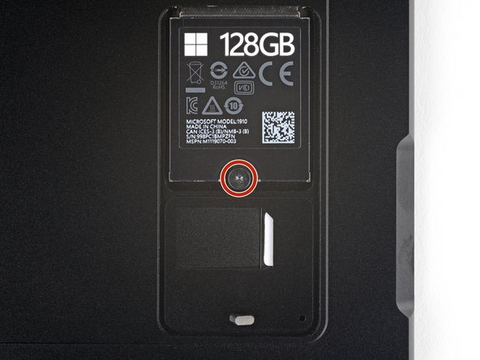
- Insert a SIM card eject tool into the small hole found at the bottom right corner of the SSD and SIM card door.
- It's a tiny hole near the bottom right corner.
- Apply pressure to gently open the door.
Step #3. Remove The SSD and SIM Card Door

- Lift up the SSD and SIM card door to take it off from the Surface Pro 8.
Step #3(a). Remove The SSD Screw
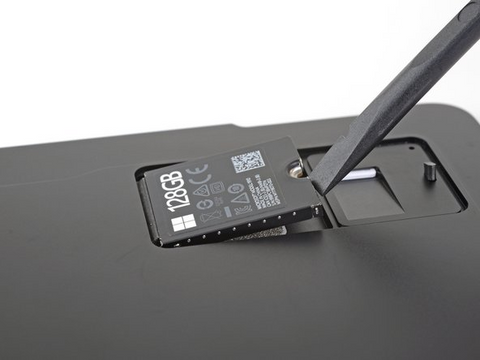
Now you can see a screw securing the SSD.
- Use a 3IP Torx-Plus screwdriver and remove the SSD And Card
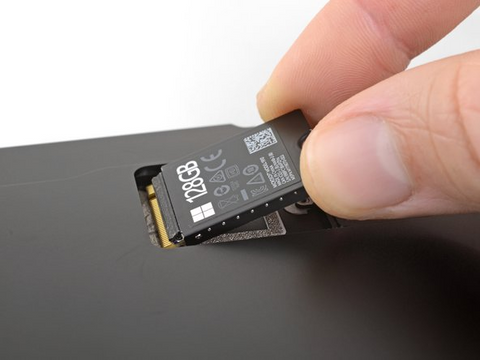
- Use your finger or a plastic spudger to raise the SSD until it's above the edges of its space.
- Be careful not to raise the SSD too much, as it could harm the SSD or its slot.
- Carefully pull the SSD directly out of its slot.
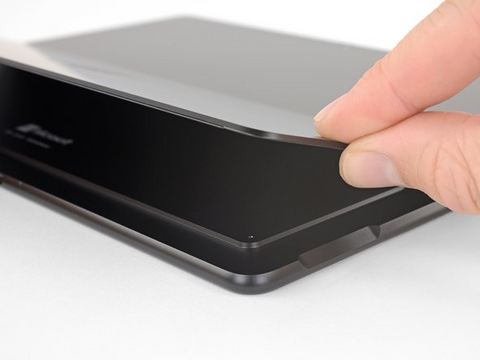
Step 4#. Place A suction Cup On the Screen
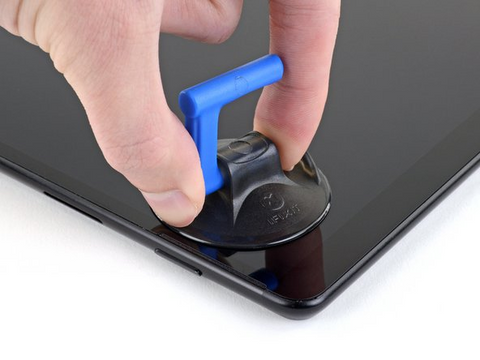
- It is time to place your table screen up on the work surface.
- Now apply a suction cup on the screen.
- It is better to place it on the right side next to the speaker grill.
Step 5#. Hold Your Surface Pro 8
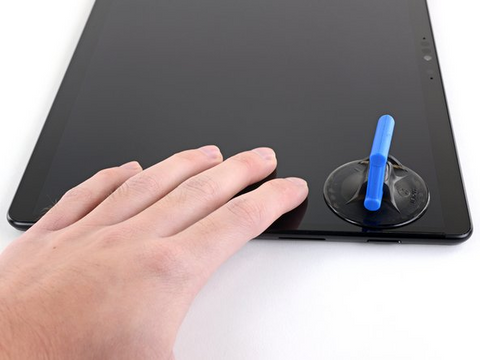
When placing the suction cup and pulling the screen to create a gap it is right to put your hand to support the screen. That way you can prevent screen damage.
Step 6#. Gently Pull Up To Create The Gap

- Gently lift the suction cup to create a small space between the screen and the frame.
- You only need to make the gap wide enough to fit an opening pick.
- Carefully slide the opening pick about 2 mm into the gap. Keep it there to prevent the gap from closing again.
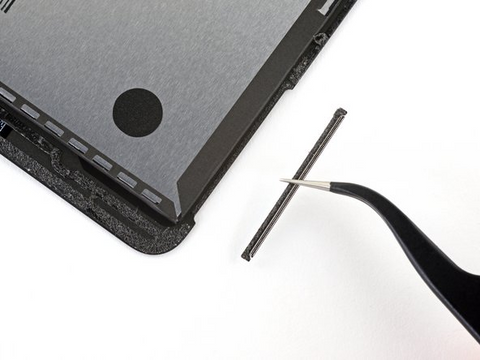
Marking Opening Picks
- Please don't insert an opening pick more than 3 mm far into the screen. The trick to prevent internal component damage is to mark your opening picks before inserting them into the Surface Pro 8.
- Take a ruler and a pointer or marker place the ruler at the tip of the pick and mark i line measuring 3 mm. This mark is for the right, bottom and left edge of the screen.
- Now again put the scale and mart it at 10 mm for the top edge of the screen
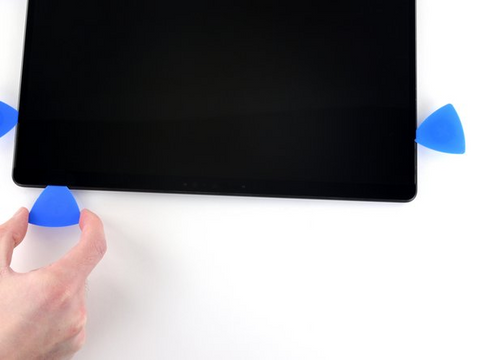
Step 7#. Slide The Opening Pick
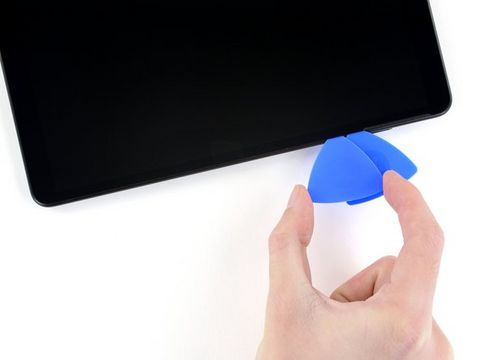
- Now carefully insert another opening pick into the gap next to the first one.
- Gently slide this pick down the right edge of the Surface. It is to cut through the adhesive holding the screen.
- Once you have done this leave the second opening pick in place along the right edge to stop the adhesive from sticking again.
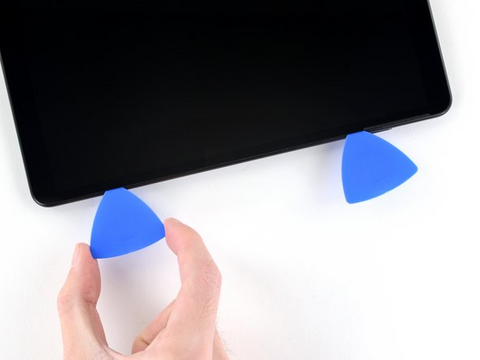
Step 8#. Insert Another Opening Pick


- It is time to insert the third-opening pick.
- Start inserting it next to the second one at the right button right corner of the Surface Pro 8.
- Gently slide it around the corner to separate the adhesive.
- Now turn the pick toward the bottom edge of the surface pro 8.
- Next slide the pick along the bottom edge of the Surface separating the screen from the frame by cutting through the adhesive.
- Once you've done this keep the pick in place along the bottom edge to make sure the adhesive doesn't stick again.
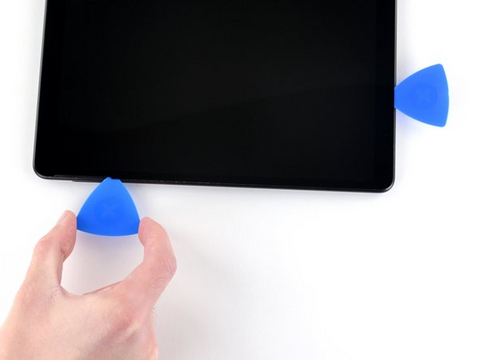
Step 9#. Insert Forth Opening Pick
- Now insert another opening pick into the bottom left corner and carefully slide it around the corner towards the left edge.
- Continue sliding the pick along the left edge of the Surface to cut through the adhesive holding the screen in place.
- Make sure to leave this pick on the left edge to prevent the adhesive from sealing again.
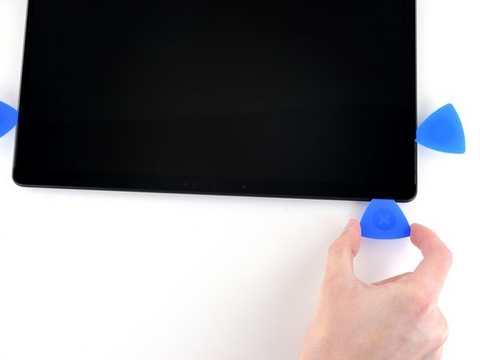
Step 10#. Separate The Adhesive Of Top Of The Surface Pro 8
- Now place a fifth opening pick into the top left corner and gently slide it around the corner towards the top edge.
- Carefully continue sliding the pick along the top edge of the Surface to cut through the adhesive.
- Please make sure to insert only a 10 mm opening pick in the top edges of the screen.
- Inserting too far can badly damage the internal connections and components.
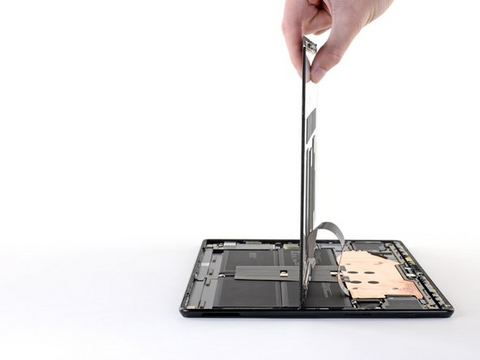
Step 11#. Lifting The Screen
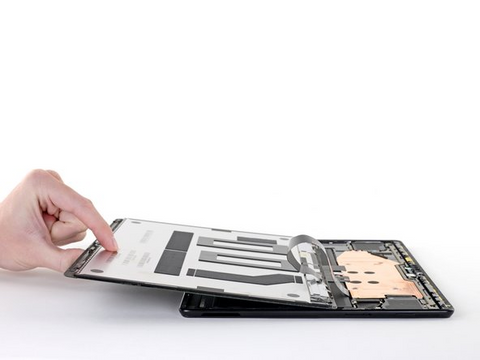
- Raise the top edge of the screen to about a 30-degree angle relative to the frame
- If you face any resistance stop and make sure that all adhesive has been evenly separated. Use an opening pick to cut through any remaining adhesive.
- Rotate the screen so that its bottom edge aligns with the centre of the frame. Make sure the screen is positioned perpendicular to the frame.
- Next it's time to rotate the screen 90 degrees so that it faces downwards. Carefully set the screen onto the frame.
Be Careful
- At this stage you have to be very careful. Don't take off the screen. It's still connected to the motherboard by a cable. Keep the screen close to the Surface's frame to avoid stretching the cable.
- Do not touch the battery with the screen. If the battery gets damaged it could leak dangerous chemicals or even cause a fire.
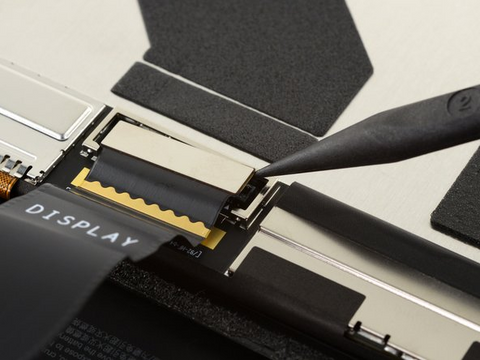
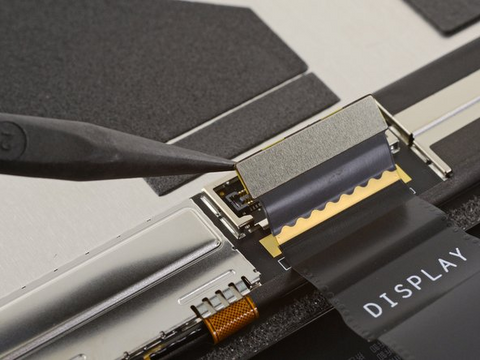
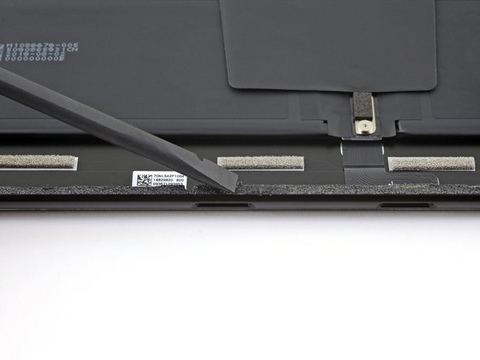
Step 12#. Remove The Display Cable Shield
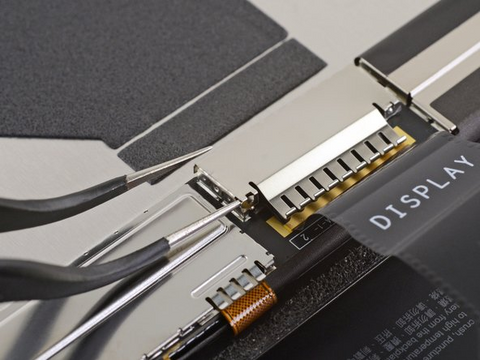

- Slide the pointed end of a pair of tweezers under the bottom right corner of the display cable shield.
- Where the cable points downwards.
- Lift the corner gently to detach it from the screen.
- Do the same with the left corner of the screen cable shield.
- If the display cable shield remains partly attached to the screen carefully pry up other areas along the edges of the shield until it is fully detached.
- And put the mantle shiel separate and secure it.
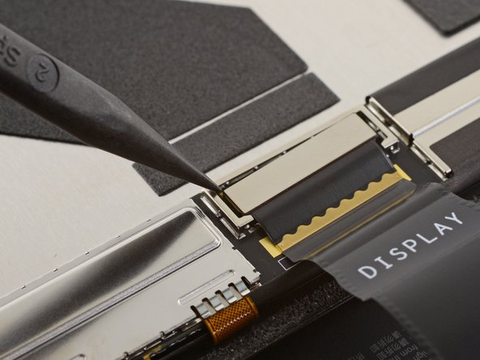
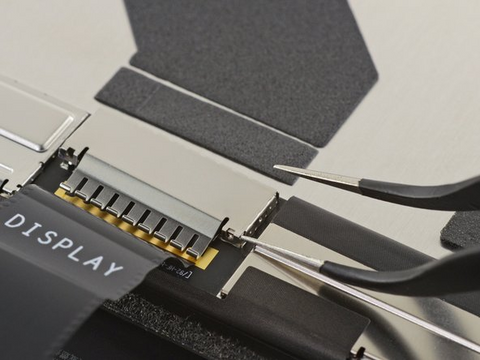
Step 13#. Disconnect The Screen Cable
- Slide the pointed tip of a spudger under the right edge of the display cable press connector.
- Gently lift the right side of the press connector to disconnect it from the display cable socket located on the screen.
- Perform the same action on the left side of the display cable connector to make sure it is completely detached from the screen.
Step 14#. Remove The Screen
- Now you can aisy separate the screen.
- Carefully put the screen the screen aside.
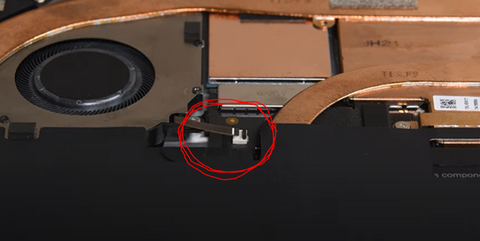
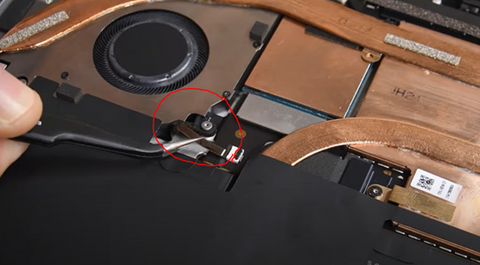
Step 15#. Remove The Thermal Module

- It is time to locate the fan’s connector on the device and flip it for unlocking.
- Now with the help of tweezers you can flip it out and unlock the fan and thermal module.
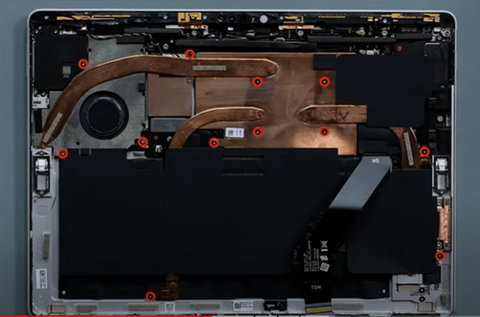
Step 16#. Unfasten The Screws From The Thermal Module
- Here you will see 12 screws that are securing the Thermel model on the surface pro 8.
- Remove the screws with the suitable screwdriver.
- Keep the screws safe for reassembling your Surface Pro 8.
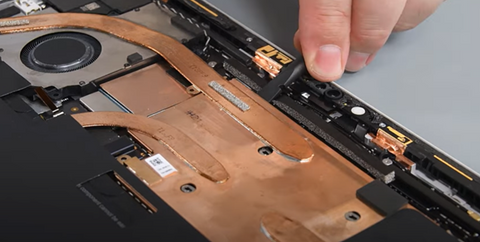
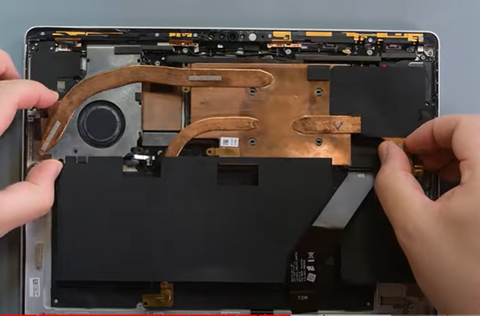
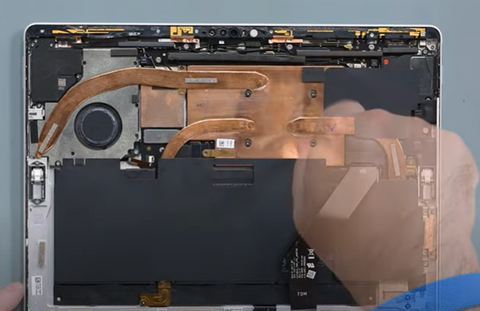
Step 17#. Removing The Thermal Module
- It's time to remove the thermal module from the device.
- Pry up the copper shield with the help of a spudger.
- And now with your hands carefully lift the thermal module.
- Hold the copper shield and the above part of the fan and lift it away from the device.
- Keep it aside in a secure place.
Note
- After removing the thermal module you will see the remaining thermal paste.
- You have to flip off the thermal paste from the system on the chip area.
- Now apply isole alcohol and lint-free cloth to remove any residual thermal paste from the system chip area.
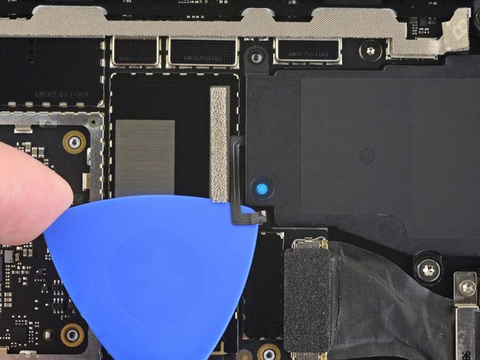
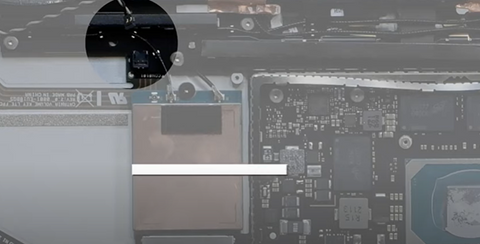
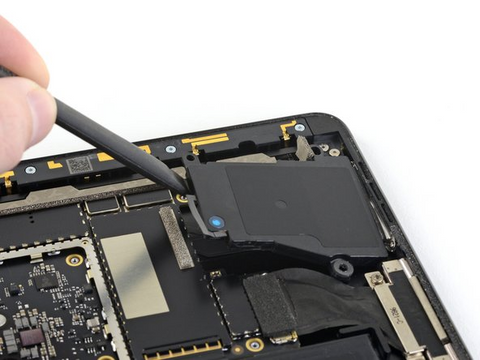
Step 18#. Disconnect The Speaker Cable

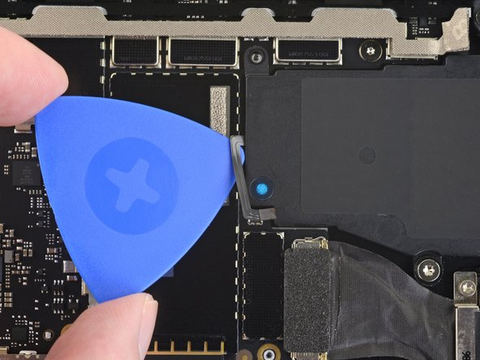
- Use the pointed tip of a spudger to separate the press connector of the right speaker from its socket.
- It's time to employ an opening pick to slice through the adhesive under the cable of the right speaker and separate it from the frame.
- Now use the flat end of a spudger to lift the foam adhesive that covers the top right screw of the right speaker
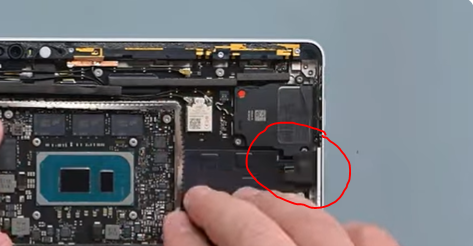
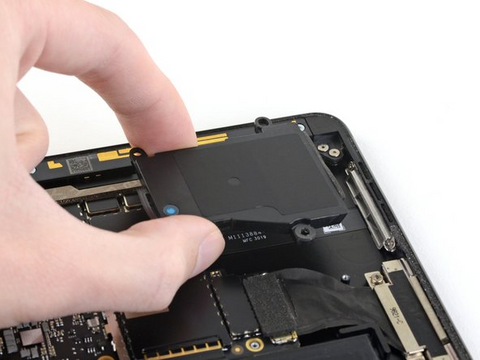
Step 18(a)#. Remove The Right Speaker Screws
- Open two screws from the right speaker and keep them securely aside.
- Lift the speaker with the help of a spudger and remove it.
- If you are replacing the left speaker also you can open the screws from the left speaker too
- And pry up the left speaker with the help of a spudger.
Step 19#. Install New Speaker On the Surface Pro 8
- Now you can install a speaker.
- Carefully align it in the speaker's place.
- With the help of your finger fill the snug fighting
Step 20#. Fasten The Screws

- Now carefully fasten the screws on the speakers.
- Make sure to put back the security sealing tape on the right screw.
Step 21#. Install Heat Spreader Tape
- It's to reinstall heat spreader tape.
- With the help of your fingers you can set it.
- Apply a gasket spring and set it down with your hands.
- Make sure that it's fully seated.
Step 22#. Replace The Thermal Module
- It is time to carefully align the thermal module
- Place it in the right place.
- Locate the screw holes and adjust them accordingly.
- Align the copper shield cover and spring gasket.
- Press down to fit it correctly.
Step 23#. Fasten The 12 Screws

- Now it's time to reinstall all 12 screws back.
- Carefully and correctly secure the thermal module.
Step 24#. Place The Fan zi Connector
- Now locate the fan zi connector.
- Use a tweezer and insert the fan’s cable into the lock.
- Press down the locking bad to lock the fan’s connector.
Step 25#. Information For Speaker Grille

If the left and right speaker grilles are affixed to the Surface's frame or the screen. You'll need to remove them carefully.
- You can start with the application of an opening pick to slice through the adhesive under the grille.
- Once the adhesive is cut carefully remove the speaker grille.
- Repeat the same process for the other speaker grille.
- Now if you have the other speaker grill you can install it now in the same place.
Note
You can skip this information if you do not want to replace or remove the speaker grill from both sides or any one side.
Step 26#. How To Remove Screen Adhesive
If you're considering replacing the screen adhesive you can do like this.
- Start by applying a few drops of high-concentration (90% or higher) isopropyl alcohol to the adhesive.
- Next use a cotton swab or the flat end of a spudger to gently scrape away the adhesive.
- Otherwise you can use a pair of tweezers for lifting away the old adhesive.
- Once the adhesive is removed use a lint-free cloth or a coffee filter to wipe away any remaining residue
- Make sure to let the surface dry completely before proceeding.
- Then apply new adhesive strips or pre-cut adhesive to the frame where the old screen adhesive was located.
Note
You can skip this information if you do not want to replace or remove the speaker grill from both sides or any one side.
Step 27#. Re-installing The Screen

- However it's time to re-install the screen.
- Clean the screen with a lint-free cloth
- Place the display module on the Surface Pro 8 and flip it down the face.
- Here you have to connect the display cable of the Surface Pro 8.
Step 28#. Connect the Display Cable
- Align the press connector properly before reconnecting.
- Gently press down on one side until it clicks into position.
- Repeat the process on the other side.
- Avoid applying pressure to the middle of the connector.
- Misalignment can lead to bending of the pins and permanent damage.
Step 29#. Place The Display Cable Shield
- Now cover the display connector with the display cable shield.
- With the help of your finger snugly fit one side of the shield
- Now repeat the same procedure for the other side of the shield.
- Feel with your if it is correctly fit to its place.
Step 30#. Flip And Align the Display Module
- Now the display is attached to the cable.
- You can check the device that is it working correctly in all ways.
- Then lift the screen up and flip it to set on the frame.
- Try to put it exactly.
- Press the display carefully and evenly on all the edges of the screen.
Step 31#. Install The SSD And SIM Card

- Put the SSD back in its place.
- Try to settle it like “start from the lifting up position then insert it into the place and gently keep it down and set it in place.
- Tighten the SSD screw using a 3IP (Torx-Plus) driver until it's snug and seated.
- Give the screw another 45-degree turn or until it's fully fastened.
Conclusion
Congratulations! Your Microsoft Surface Pro 8 Speaker Replacement is successful. We hope that this guide has helped you in every way. However We have mentioned all the steps of the surface Ptro 8 speaker replacement. This comprehensive guide also gives you ideas about securing your devices from further damage.
Make sure to follow the guide carefully and don't skip any steps. Keep the safety tips in mind too. If you're unsure don't try it alone. It's better to get help from a professional service centre like Screen Fixed. Your device's safety is important, so it's best to trust experts. Until next time take care of your Surface Pro 8, and we're here to help whenever you need us.