Are you looking for a guide to restore the motherboard of your Samsung Galaxy S21? You have reached the right place! Follow our easy step-by-step guide to Samsung Galaxy S21 Motherboard Replacement.
Here is an ultimate guide to replace the defective motherboard of your Samsung Galaxy S21.
Step 1 Prepare All Mobile Repairing Tools
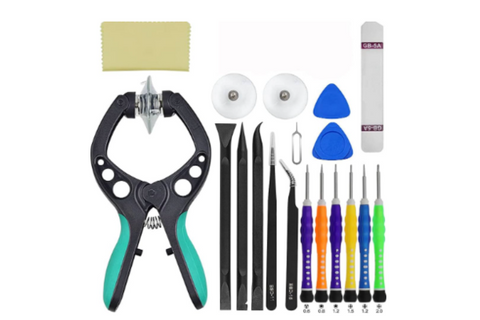
Gather all these mobile repairing tools to replace the motherboard of your Galaxy S21.
- Hairdryer or Hot air gun
- A Set of screwdrivers
- Plastic opening pick
- A Suction Cup
- A pair of tweezers
- Isopropyl Alcohol
- A cotton bud
- New adhesive glue
- New Motherboard for your Samsung Galaxy S21.
Step 2 Turn Off The Samsung S21
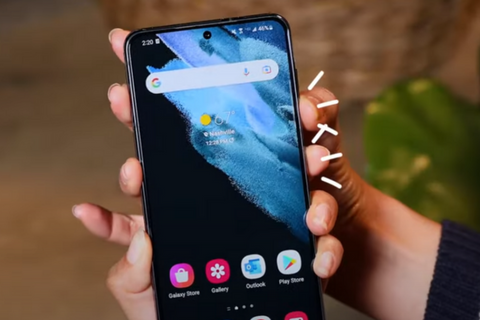

- Press and hold the power button and volume down button together for a few seconds.
- A power menu will appear on the screen. This menu provides options for powering off, restarting, or putting the device into emergency mode.
- From the power menu, select the "Power off" option.
Step 3 Use The SIM Tray Ejecting Tool
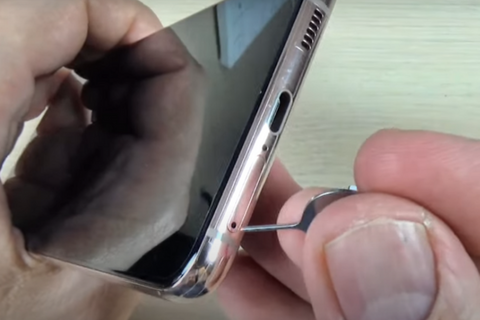
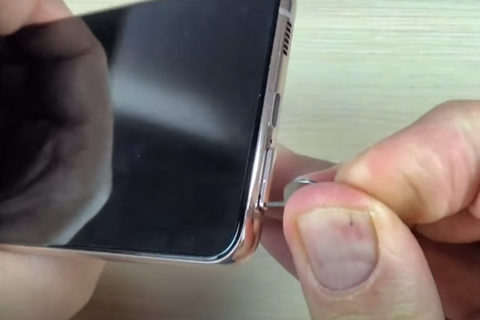
- Take the SIM ejection tool or pin.
- Locate a tiny hole near the SIM Tray.
- Insert the pin into the hole.
- Apply a little pressure until.
- The SIM Tray will pop out.
- Pull out the SIM tray from the phone using your fingers. Keep it aside.
Step 4 Heat The Corners Of The Samsung S21
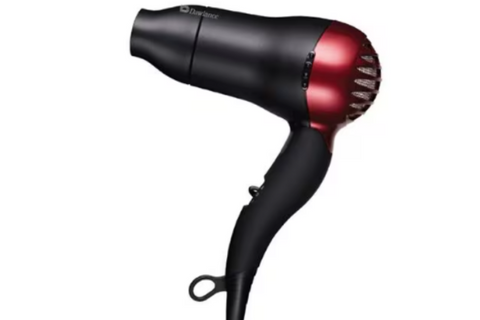
- Adjust medium heat settings on your hot air gun or hair dryer. You can also use a hot plate.
- Heat all four sides of the Samsung S21 from the back side for at least 5 to 6 minutes. Heat will melt the adhesive glue, and you can cut it easily.
Important Tip
Hold the hot gun or hair dryer 5 to 10 cm away from the phone. Do not overheat the phone.
Step 5 Apply A Suction Cup
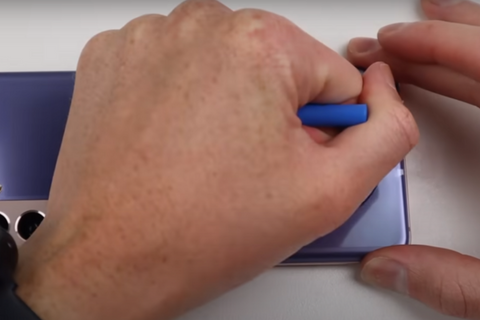
- Attach a suction cup to the back cover near the bottom edge of your S21.
- Pull the cup to create a small gap between the back cover and the phone frame.
Step 6 Insert An Opening Pick
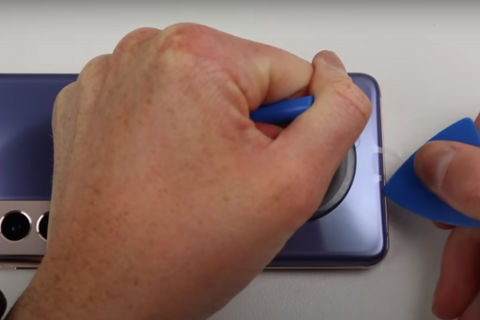
- Insert a plastic opening pick or tool in the gap between the back cover and the phone frame.
Step 7 Cut The Bottom Adhesive
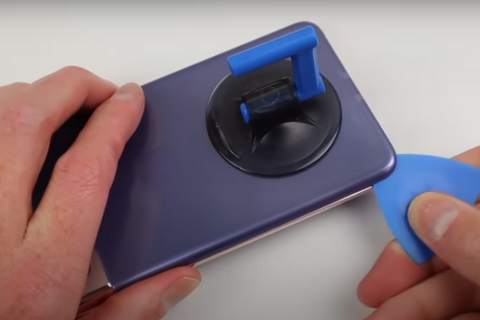
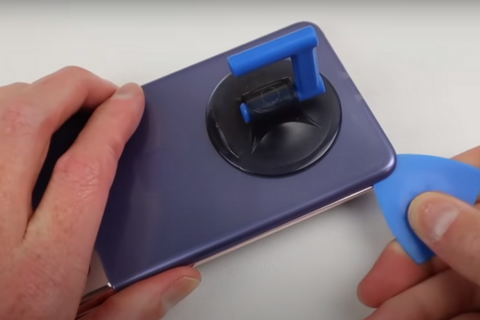
- Slide the opening pick from one lower corner to the other to cut off the bottom adhesive.
Step 8 Remove The Left Side Adhesive
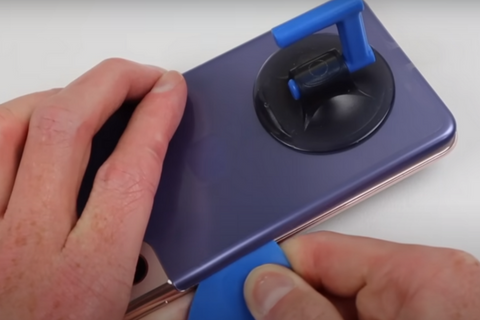

- Remember that the rear camera is at the top left corner of your Samsung Galaxy S21. There is a little more adhesive around the rear camera shell of your S21.
- It may be tough to cut the adhesive around the upper left corner. Heat the top left edge again to soften the strong adhesive.
- Move the plastic pick from the lower left edge to the upper left corner. Repeat this movement 3 to 4 times.
Step 9 Slice The Upper Edge Adhesive
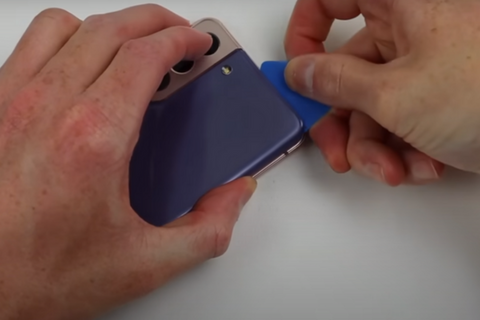
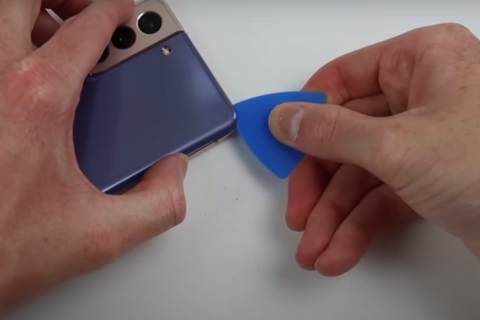
- Move the opening pick from the upper left to the upper right corner to cut the upper edge adhesive.
Step 10 Remove The Right Side Adhesive
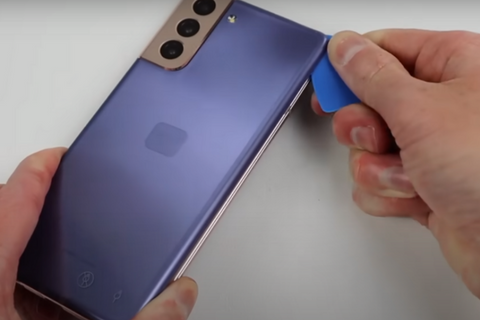
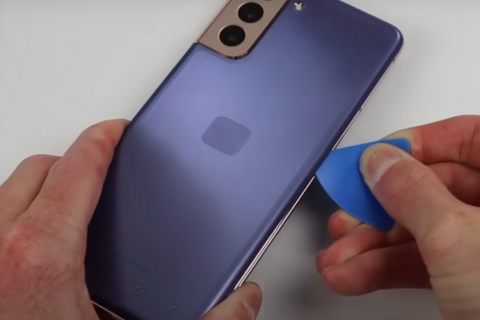
- Keep sliding the plastic pick from the upper right edge to the lower right corner.
- You will remove the adhesive glue from all four sides of the phone.
- If the adhesive is difficult to cut, heat your S21 again for two to three minutes.
Step 11 Separate The Back Cover Of The S21
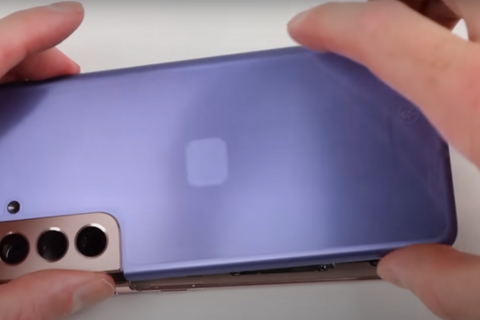
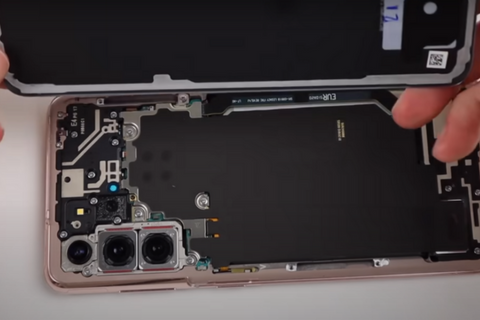
- Use your fingers to hold and remove the rear cover of your S21.
- Keep it aside.
Step 12 Unfasten The Samsung S21 Motherboard Bracket
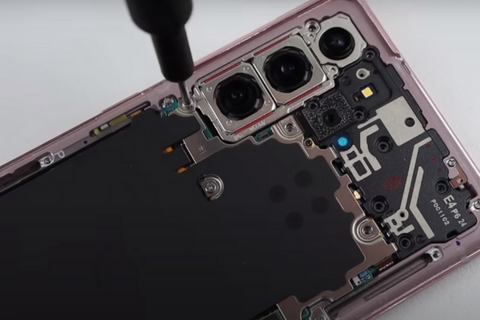
- The motherboard bracket is attached to the phone frame with five 4 mm long screws. Unscrew these five screws with the help of a screwdriver. Keep the screws in a safe place.
- Take a pair of tweezers to unclip and remove the motherboard bracket.
Step 13 Disconnect The Battery
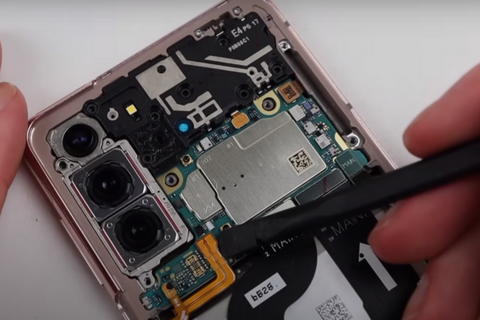
- Unclip the battery press with a flathead spudger while holding up the motherboard bracket with tweezers or your fingers.
Step 14 Disconnect The Wireless Charging Coil Of S21
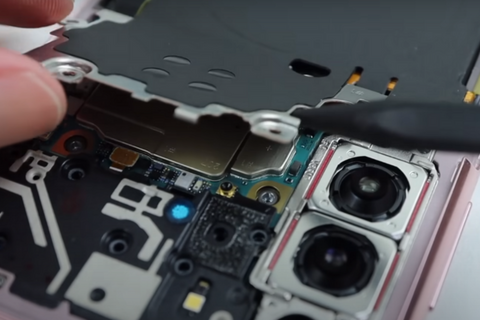
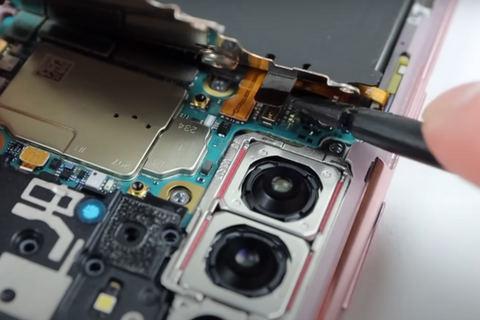
- Continue holding the motherboard bracket up with your fingers or tweezers.
- Pry up and disconnect the press connector of the Samsung S21 wireless charging coil.
Step 15 Remove The Wireless Charging Coil
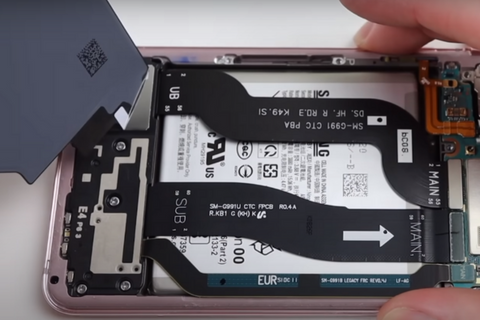
- Peel off the wireless charging coil with your fingers and remove it from the phone.
Step 16 Unfasten The Earpiece Speaker
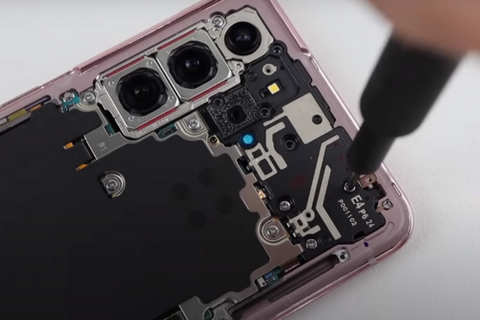

- Use a screwdriver to unscrew the seven 4 mm long screws securing the earpiece speaker to the motherboard of S21.
Step 17 Remove The Earpiece Speaker
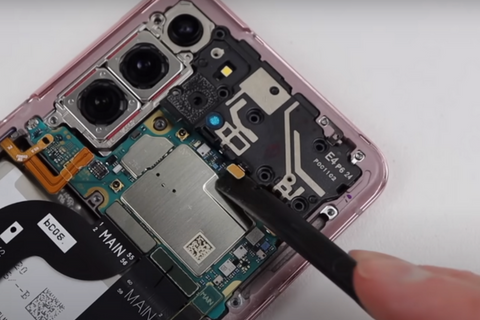
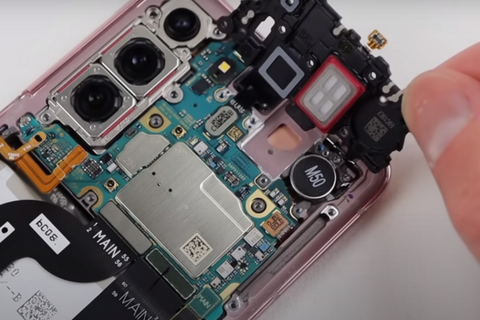
- Pry up the Earpiece Speaker to unclip it.
- Remove the earpiece speaker with the help of your fingers or tweezers.
Step 18 Disconnect The Front Camera
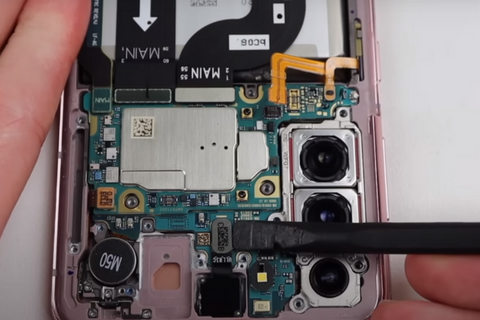
- Pry up the front camera press connector to disconnect it from the motherboard with the help of the Front Camera.
Step 19 Disconnect The Right Side Cables
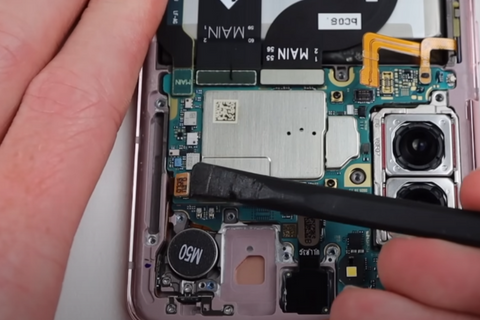
- Use a spudger to pry up the right-side antenna cable press connector.
Step 20 Disconnect The Left 5G Antenna
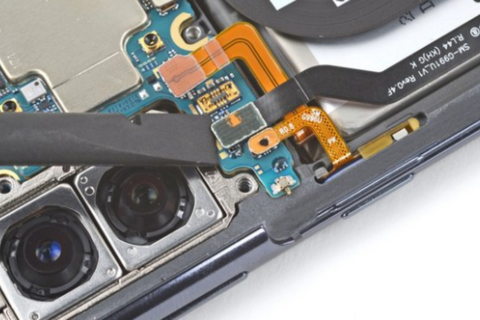
- Pry up the left side 5g Antenna press connector with a spudger.
Step 21 Disconnect The Flex Cables
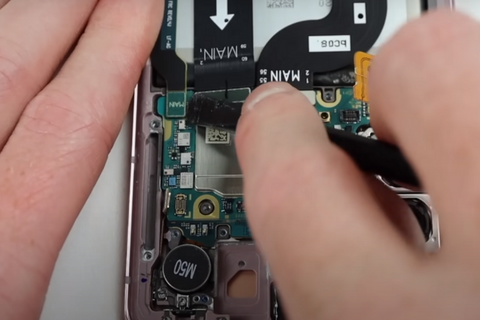

- Detach the press connectors of the two flex cables to disconnect them from the motherboard.
Step 22 Disconnect The Display Cable

- Pry up the press connector of the display cable with a spudger.
Step 23 Disconnect The Power Button Cable
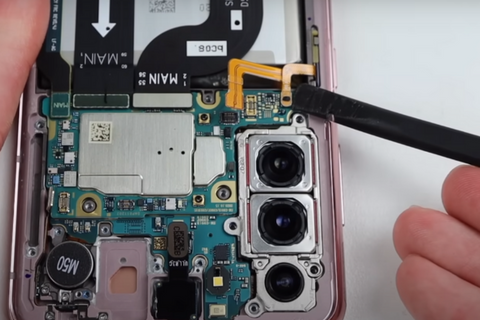
- Use a spudger to disconnect the power button cable from the motherboard.
Step 24 Unfasten The Rear Camera Assembly
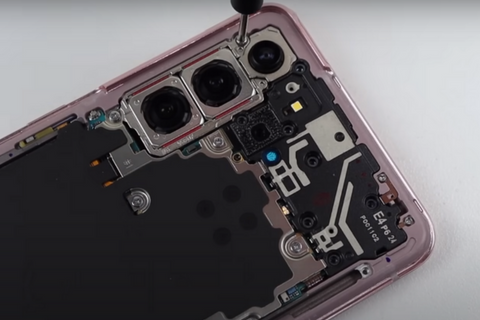
- Unscrew the 4 mm screw securing the camera bracket and the motherboard to the phone frame.
Step 25 Remove The Motherboard Assembly
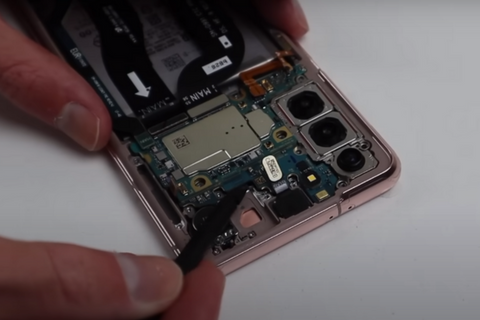
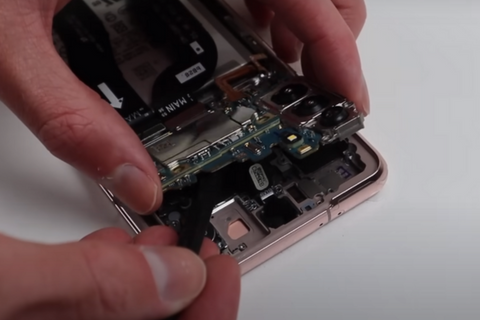
- Pry up the motherboard from its recess with the help of a spudger.
- Remove the motherboard.
Step 26 Remove The Ultra Wide Camera
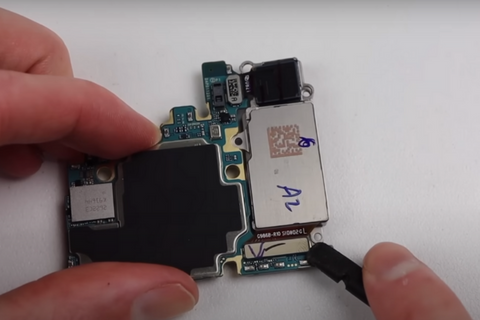
- Disconnect the ultra-wide camera from the motherboard with the help of a spudger.
Step 27 Remove The Wide and Telephoto Camera
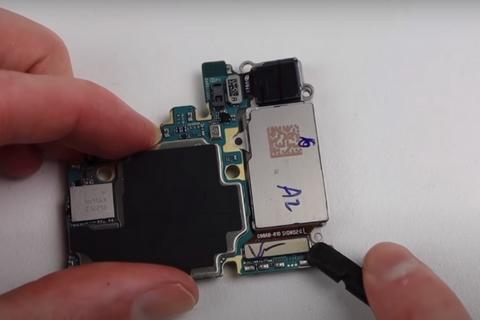
- Disconnect the wide and telephoto camera from the motherboard.
Step 28 Install The New Motherboard
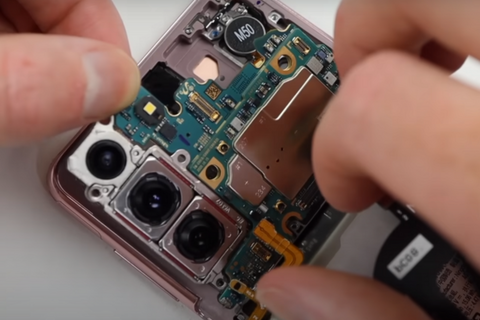
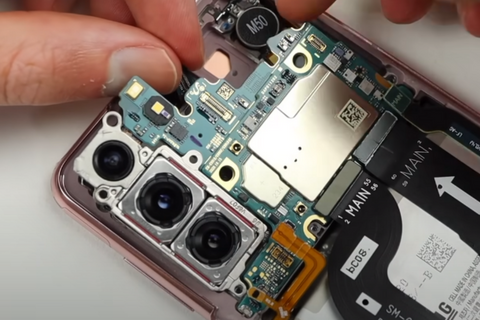
- Connect the ultra-wide, telephoto, and the wide camera to the new motherboard.
- Install The New motherboard into its recess.
Step 29 Reassemble Your Samsung Galaxy S21
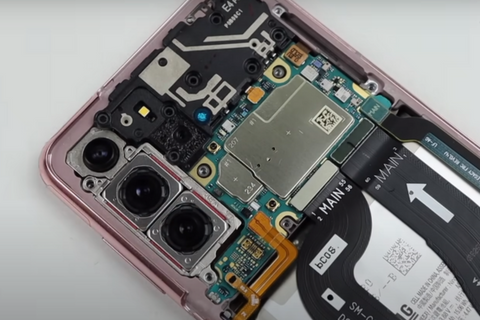
- After replacing the faulty motherboard with a new motherboard compatible with Samsung Galaxy S21, follow all the above steps in the backward direction.
- Reconnect all the press connectors to the motherboard.
- Fasten up all the screws.
Step 30 Remove Old Adhesive

- Dip a cotton bud into the isopropyl alcohol.
- Rub this bud with the old adhesive from the sides of the back cover and phone frame.
- Wait for a minute for Isopropyl alcohol to soften the old adhesive.
- Take a piece of lint-free cloth to remove the remaining adhesive around the edges of the phone frame and back cover.
- Apply new adhesive around the edges of the back cover.
- Carefully attach the back cover to the phone.
Wrapping Up
Congratulations! You have successfully learned how to replace the defective motherboard of your Samsung Galaxy S21 with our step-by-step instructions. Turn on your Samsung Galaxy S21 and enjoy the fast processing performance of your S21.

