
Welcome back! We are here to present another helpful step-by-step guide. This time we are focusing on Samsung Galaxy S20 Wireless Charging Coil Replacement. If you have been facing issues with your Galaxy S20's wireless charging or simply want to replace the charging coil you are in the right guide.
However, our step-by-step instructions are simply designed to make the repair and replacement process easy to follow. We aim to make sure you can tackle the repairing and replacement task with confidence. So, let's start replacing the Samsung Galaxy S20 wireless charging coil and enjoy the best charging permanence again.
Samsung Galaxy S20 Wireless Charging Coil Replacement
Certainly before moving towards Galaxy S20 wireless charging coil replacement we should know some important points. So here we go.
- Samsung Galaxy S20 is strongly sticking from the inside. So when dealing with tough adhesive in the Samsung Galaxy S20 you should use isopropyl alcohol with over 90% concentration.
- Never apply heat to a swollen Samsung Galaxy S20 battery.
- Take caution and appropriate steps when removing the battery.
- For safety make sure to drain the Samsung Galaxy S20 battery to less than 25% before starting any repair work.
Step #1. Gathering Tools For Samsung Galaxy S20 Wireless Charging Coil Replacement
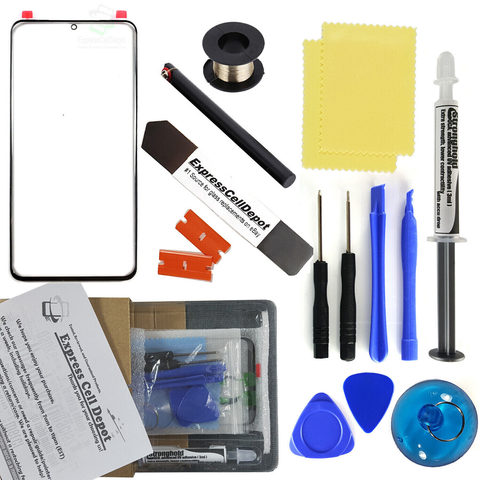
Firstly you have to begin by gathering all the required tools to replace the Samsung Galaxy S20 wireless charging coil. Because it's truly frustrating to look for the tool when you urgently need that. Also by this action you can keep your mind focused on the repairing action. So never try to leap into this step. What tools may be needed during the Samsung Galaxy S20 Wireless charging coil replacement are listed here.
- Phillips #00 screwdriver
- Plastic Spudger
- Tweezers
- Suction Tool
- 4 to 5 Opening Picks
- Heating Tool (Heat Gun, Hot Plate, Straightener, Hair Dryer, etc.)
- A small cup for securing unfastened screws
- Replacement adhesive
- A lint-free cloth
- Wireless Charging Coil
Step #2. Power Off Samsung Galaxy S20
However powering the Galaxy S20 for repairing/replacing purposes is essential. When the phone is powered on and you give heat to that phone it can harm the display.
How To Power Off Samsung Galaxy S20 For Charging Coil Replacement
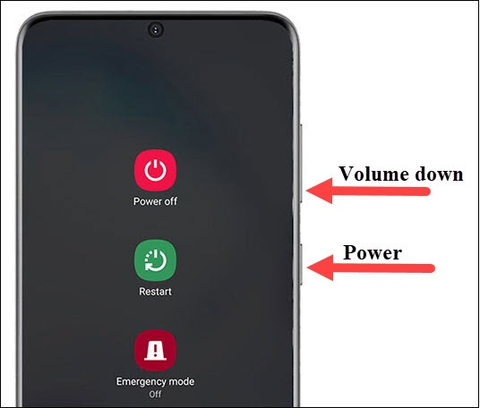
- Press and hold the Side key and the volume down button together to turn off your Samsung Galaxy S20.
- A menu will show up on your screen. Choose "Power off."
- Your phone will switch off completely.
- Doing it this way saves battery and makes sure your phone is safely turned off.
Step #3. Give Heat To The Bottom Of Samsung Galaxy S20
- Heat up a heating tool and place it on the bottom edge of the back cover of the Galaxy S20 for two minutes.
- Dont apply heat for more than two minutes
- You can use a hair dryer, Hair Straightener, heat gun, or hot plate. But be careful not to make the phone too hot. Too much heat can damage the display and the battery’s internal components.
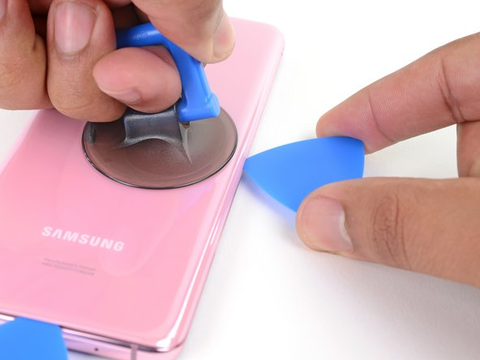
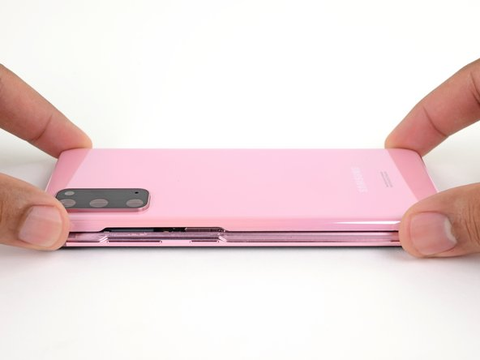
Step #4. Apply A Suction Cup
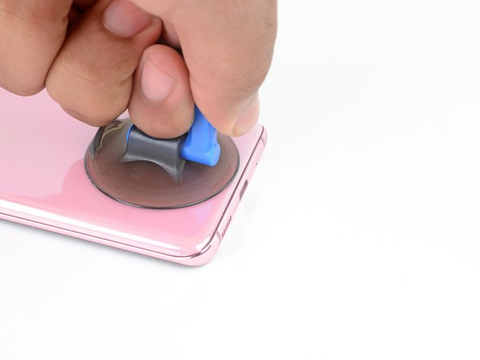
It's time to apply the suction Tool on the back side when you have apple heat. Please try to keep it as close to the center at the bottom edge as possible.
- If your S20 phone's screen is broken you can apply clear tape on it so the suction cup can easily stick. On the other hand you can use strong tape instead of the suction cup. If nothing else works you have the option to use super glue to stick the suction cup to the broken screen.
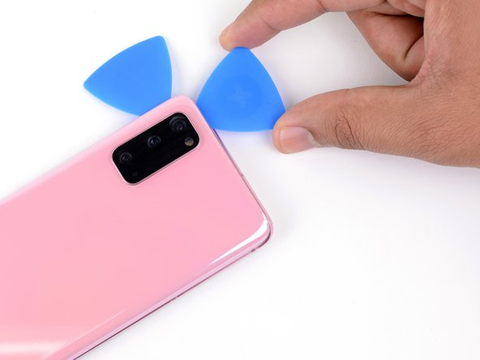
- Pull the suction cup with a steady force. But you have to tackle it gently to make a gap between the back cover and the frame.
- Use a tool called an opening pick to slide into the gap.
- It might take a few tries of heating and using the suction cup before you get it right because the space is tight.
- If you're having trouble making a gap, try heating the edge more and then try again.
- Don't push too hard with the pick or you might break the back cover glass.
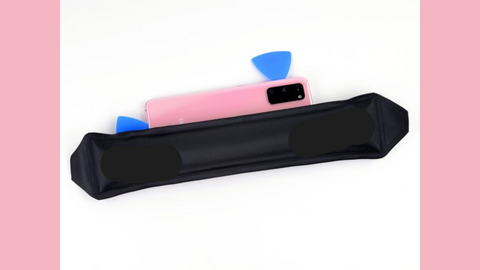
Step #5. Slide The Opening Pick
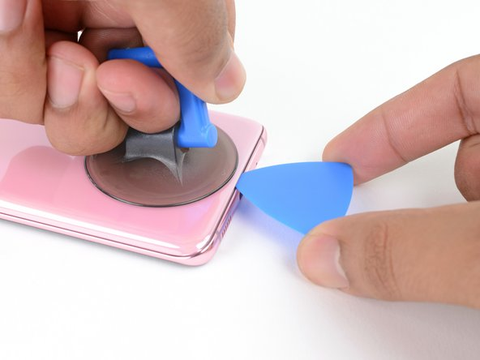
- Move the pick backward and forward along the bottom edge to separate the glue.
- Be gentle while sliding near corner edges. Because here the class is curved.
- Leave the opening pick here in the gap. It will prevent the glue from sticking again.
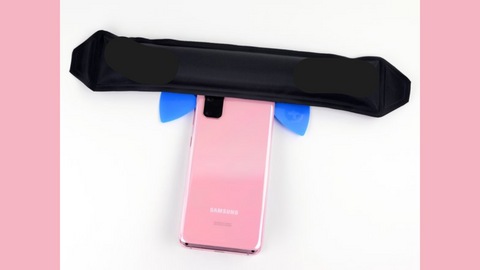
Step #6. Give Heat To The Left Edge Of The Samsung Galaxy S20

- It is time to apply a heating tool on the left edge of the phone for two minutes.
- Don't give too much heat to the phone.
Step #7. Apply Suction Cup At The Left Edge
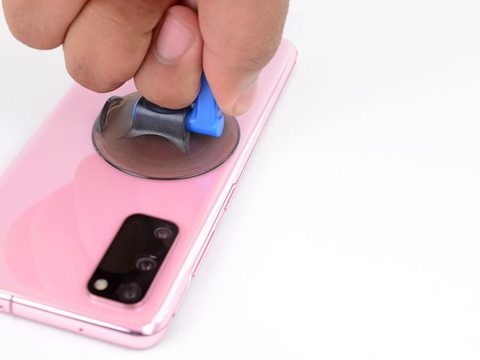
This time for separation of the adhesive from the left side of the phone. For this you can follow these steps.
- Stick the suction cup onto the back of the phone near the middle of the left side.
- Pull the suction cup hard to make a gap between the back cover and the frame.
- Here you use an opening pick to slide into the gap.
- Because the edge of the glass is curved. Therefore you won't be able to slide the pick very far. Just make sure the tip goes under the edge of the glass.
- You might take a few tries to get it correctly inserted because the space is tight.
- If you're having a problem making a gap you should give heating the edge more and then try again.
- At this stage you can also use some strong alcohol in the gap. It will help to loosen the glue.
- Be careful and avoid pushing the opening too hard and too far. Pushing strongly on the corve edge can break the back cover glass.
Step #8. Tilt The Opening Pick Downward

Thus up till now you have managed to insert the tip of the opening pick. Now it's time to tilt the opening pick downward and push it further. It will completely separate the adhesive. That's the clips holding the back cover in place.
Step #9. Slide The Opening Pick Along The Left Edge
- Now gently slide the pick along the entire left edge of the Galaxy S20 phone. It will help to loosen the adhesive holding the back cover.
- You have to be cautious when sliding the opening pick over the raised area surrounding the volume and power buttons. In this area the risk of glass breakage is high.
- Once you've finished sliding you should leave the opening pick under the left edge of the glass near the top left corner. It is to stop the adhesive from sticking again.
Step #10. Give Heat To The Right Edge For Samsung Galaxy S20 Wireless Charging Coil Replacement
- Apply Heat on the back of the right edge of the Galaxy S20.
- Do not do overheating.
Step #11. Apply Suction Tool
However it's time to apply the suction tool onto the right back edge of the Galaxy S20.
- Stick the suction cup and try to apply it as close to the middle of the right edge as possible.
- Be very careful while applying pressure to pull the suction cup. Don't pull with extra pressure. Now create a gap between the back cover and the frame.
- Slide the tip of an opening pick into the gap.
- Just like before, angle the opening pick downward to slide it fully underneath the back cover.
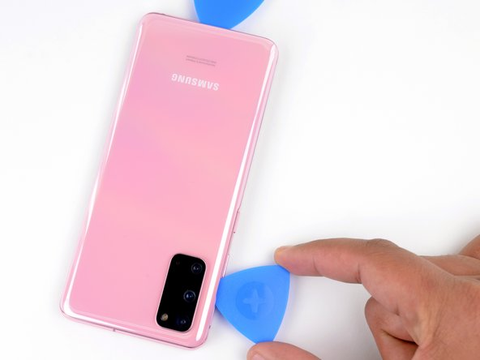
Step #12. Slide The Pick All Along The Right Edge Of The Galaxy S20
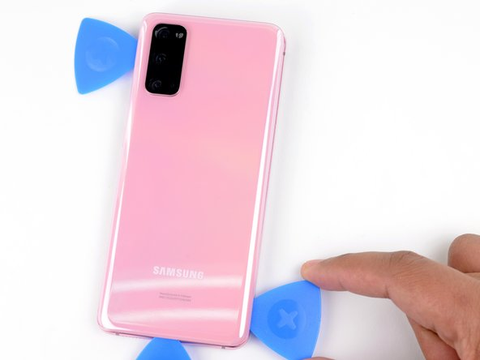
It's time to lose the right edge adhesive of the Samsung Galaxy S20.
- For this you can gently move the Opening pick along the entire right edge of the phone. It will help to loosen the adhesive holding the back cover.
- After Sliding you can leave the pick under the right edge of the glass near the top of the Phone. It is to stop the adhesive from sticking again.
- While you are separating the right edhe adhesive it is possible that the cover may release one or few opening picks. If this happens put the pick(s) aside because the bottom edge shouldn't stick again from now on.
Step #13. Heating The Top Edge For Samsung Galaxy S20 Charing Coil Replacement
- Apply a heating tool to the top edge of the Samsung Galaxy S20.
- Give heat only for two minutes.
Step #14. Separate The Top Edge Adhesive Of Galaxy S20
- Take extra care when working near the curved corners of the back cover. Because it is very sensitive and can easily crack. Be gentle to avoid damaging your phone's back cover.
- Slowly slide the pick from the right edge of the phone around to the top right corner.
- Keep separating the entire top edge until you reach the top left corner. Now it is loosening the adhesive completely that is holding the back cover in place.
- In case you feel it is still stuck at some point don't apply force to separate the cover. Apply heat to that area and proceed with the process again.
Step #15. Remove The Glass Back Cover
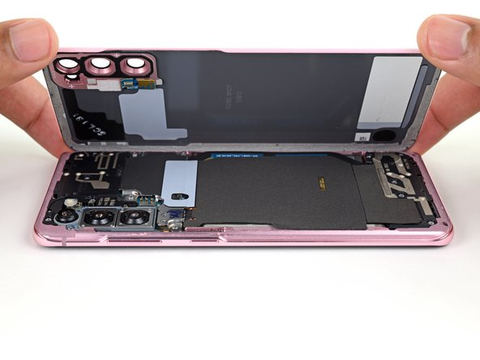
- Now carefully lift the glass back cover to remove it from the frame
- Generally keep it aside.
- If you feel the cover is still adhered you should use the opening pick to cut the remaining gum.
Step #16. Open Screws On The Motherboard Bracket
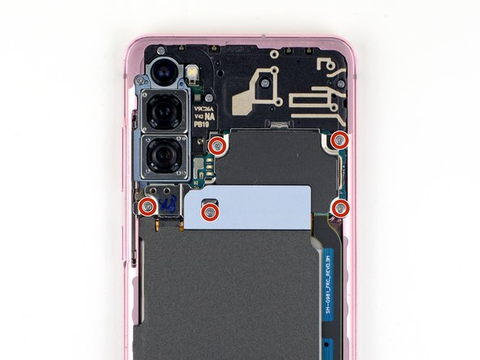
However the motherboard bracket is secure with the five fasten screws.
- Firstly take a #00 Screwdriver.
- Unfasten the 4 mm long screws.
- This time you have to make sure that you keep placing the screws in a secure place for reassembling.
Step #17. Motherboard Bracket Uncliping
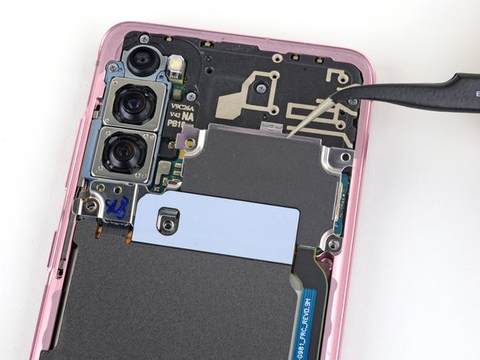
Now you can easily unclip the Motherboard bracket.
- Use a pair of tweezers to unclip the motherboard bracket.
- Pull up the Motherboard bracker from the plastic
- But don't remove the bracket fully. Because it is still attached to the wireless charging coil.
Step #18. Remove The Wireless Charging Coil
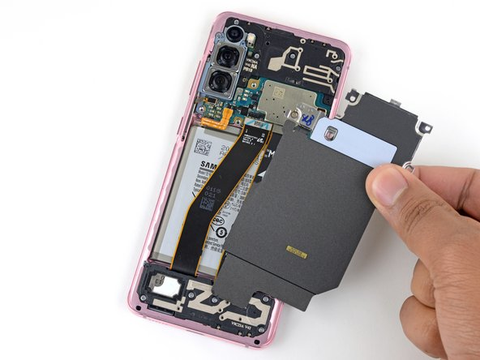
- Now it's time to carefully lift the wireless charging coil off the Galaxy S20.
- Take out the wireless charging coil.
- The coil is attached to the rest of the device with spring contacts, so you don't have to disconnect any connectors.
Step #19. Replace The Samsung Galaxy S20 Wireless Charging Coil

Finally it is time for the Samsung Galaxy S20 Wireless charging coil replacement.
- Start putting things back together by tightening the screws on the motherboard bracket. This helps get the charging coil aligned correctly.
- After tightening the screws you can press down evenly on the charging coil to set it correctly.
- Double-check that the charging coil is currently lined up. Now proceed with the pressing
- Don't apply extra pressure.
- It's time to make sure the charging coil sticks well when you're putting everything back together.
Step #20 Place Glass Back Cover
- Before closing everything up it's a good idea to turn on your phone and check that everything works properly.
- Make sure to turn it off completely again before you continue.
- If there are any leftover bits of adhesive please carefully remove them using tweezers or your fingers.
- You can apply some heat if the adhesive is hard to remove.
- For sealing up the phone you can use Samsung's custom-cut adhesives or double-sided tape.
- Carefully place the glass back cover on the frame.
- Check all the alignments
- Now press the cover with extra care. Roll your finger around every edge to evenly adhere the back cover.
Conclusion
Congratulations! Your Samsung Galaxy S20 Wireless Charging Coil Replacement is successfully done. In this comprehensive step-by-step Samsung Galaxy S20 Wireless Charging Coil Replacement guide you have learned many things. Such as how to open the cover and remove it without damaging any other component. Then we taught you how to replace the wireless charging coil and how to fit it correctly. And so many other precautions and tips.
However it's better to keep magnets and metal objects away from the wireless charging coil cause it can interfere with charging. And be careful with wireless chargers that have different power outputs as they can generate too much heat and harm the charging coil over time.
Anyhow we hope that your Samsung Galaxy S20 is now free from wireless charging issues. See you in the guide till then bye-bye!