Are you Looking to replace the loudspeaker in your Google Pixel 8 Pro? It's really annoying if your beloved phone starts producing distorted sounds, crackling noises, or no sound at all. But no need to worry. This guide has got you covered! We will walk you through the steps needed to fix the issue and restore your Pixel phone's audio quality. Keep reading to learn how to replace the loudspeaker in your Google Pixel 8 Pro and get your phone sounding great again.
How to Start Google Pixel 8 Pro Loudspeaker Replacement
Certainly mobile phones are very important in our life and their loudspeakers play a significant role in their useability. Well here you will learn everything about Google Pixel 8 Pro loudspeaker replacement. But before moving to the steps of disassembling your Pixel 8 Pro we should know the tools that are going to be used and persuasion for disassembling. So here we go!
Collect Right Tools For Google Pixel 8 Pro Loudspeaker Replacement
- A Phillips screwdriver.
- Plastic opening tools.
- Spudgers
- Tweezers
- Heat gun, hot plate, hair dryer, or hair straightener.
- Suction tool.
- Loudspeaker Replacement
Choosing The Right Place For Your Google Pixel 8 Pro Loudspeaker Replacement
When you are changing the loudspeaker in your Google Pixel 8 Pro you should choose the right spot is super important. Here is what you need to think about while making your selection.
- Make sure you can see everything clearly so you don't mess up.
- Work on a tidy and flat surface to keep your phone safe.
- Give yourself space to spread out your tools and parts comfortably.
- Find a quiet spot where you can focus without any distractions.
- If you are using tools like a heat gun make sure you are near a power source.
Marking on The Opening Pick
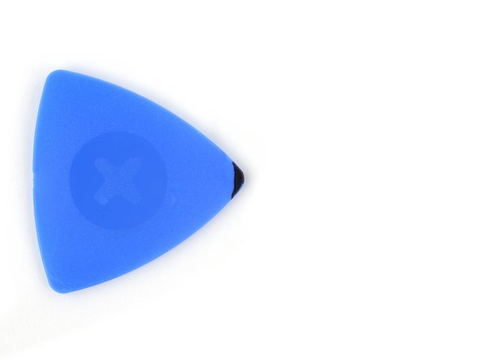
Another important tip is to mark your opening pick. Because the Google Pixel 8 Pro Loudspeaker Replacement needs screen removal and some internal component removal. That's the reason you need to mark your opening pick. However you will need about 4 to 5 opening picks for separating the screen from the frame gently and easily. However you have to be careful while inserting the opening pic. Don't insert it too far because it could damage the internal parts of your Google Pixel 8 Pro.
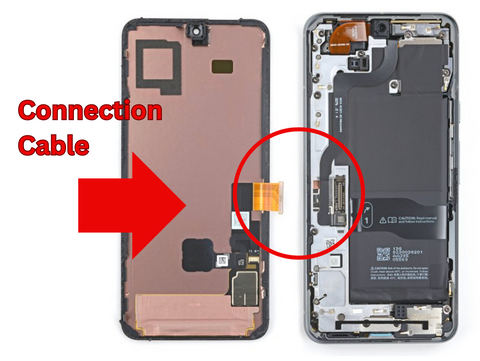
Please remember the screen cable fits in the middle of the right edge of your Pixel 8 Pro. Its delicate hook needs extra care. So any mistake could harm the connection between the screen and other vital parts. Take your time and handle this step with caution to avoid any accidents.
Furthermore you need to be careful of the spring contacts around the edges of the phone. If you accidentally bend one, it could cause serious damage. Here are two ways to mark your opening pick:
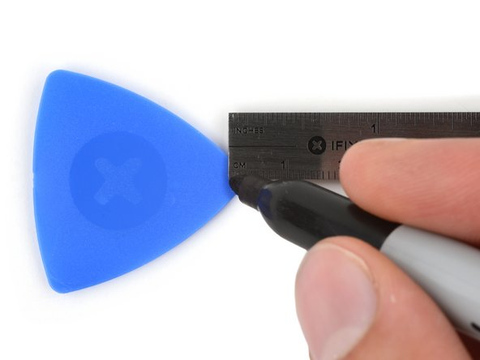
- Measure and mark 3mm on the opening pick with a marker. This mark helps you avoid pushing it too far.
- Alternatively, mark a 3mm point and attach a coin to the opening pick using tape. This will prevent you from inserting it more than 3mm deep.
Step #1. Drain the Battery
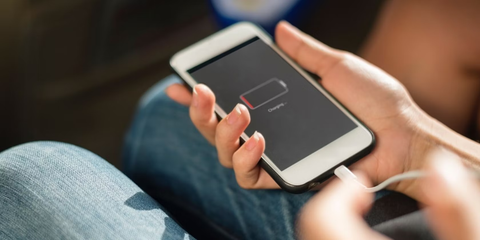
The first and most important step is to discharge your Google Pixel 8 Pro to proceed with the further steps.
- Make sure your Pixel's battery level is below 25% before you begin fixing it. This precaution is necessary because a damaged lithium-ion battery if the phone is fully charged could potentially catch fire.
- Before starting the repair disconnect all cables from your phone to ensure safety.
Step #2. Power Off Google Pixel 8 Pro For Loudspeaker Replacement
To switch off your Google Pixel 8 Pro press and hold the power button and the volume-up key together. Then when you see the options for "Power Off" and "Restart," tap on "Power Off." Let your phone shut down completely before you do anything else with it.
Step #3. Give Heat On The Bottom Edge Of The Google Pixel 8 Pro
The screen sticks to the frame with glue and clips. To remove it we need to warm up the glue.
- Turn on the heating tool and put it on the bottom edge of the screen for about two minutes.
- You can also use a hair dryer, heat gun, or hot plate, but be careful not to overheat. Because it could damage the screen or battery.
Step #4. Place A Suction Tool On The Bottom Screen
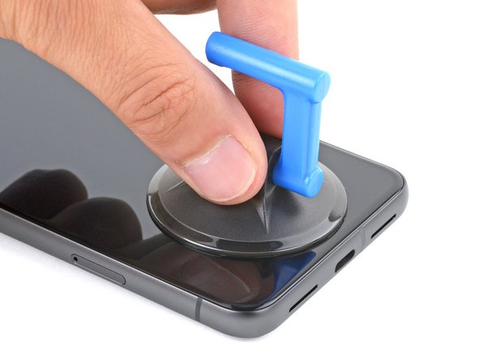
Now place the suction tool on the button edge of the screen. This suction tool application will help you lift the screen to create the gap.
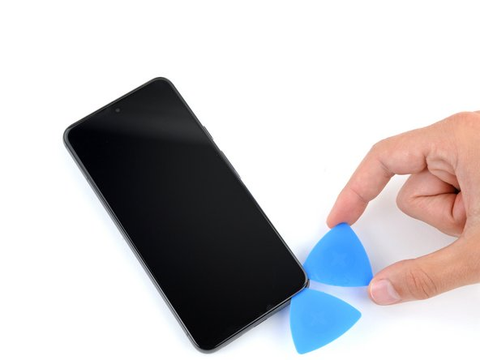
Step #5. Insert An Opening Pick
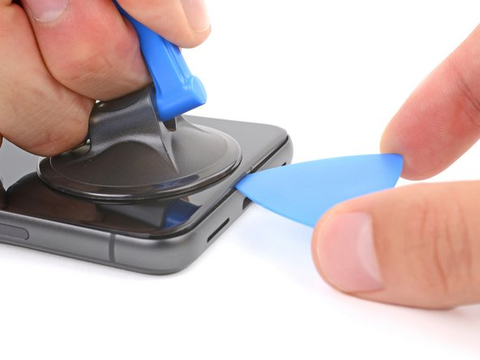
- After placing the suction tool correctly pull its handle and create an adequate gap.
- Now it is time to insert the first opening pick into the gap.
- If in any case you feel it's difficult to insert the opening pick don't try hard. Here you only need to give heat for a little more time and try again.
Don't Insert Opening Pick More Than 3mm Deep
To keep your Google Pixel 8 Pro safe don't push the pick in too far when removing the screen adhesive. Remember these spots:
- The screen cable is near the middle of the left side of the phone. Be extra careful here to avoid damage.
- There are many spring contacts around the edges of the phone. Be cautious not to bend them.
Step #6. Move The opening Pick To Separate The Bottom Screen
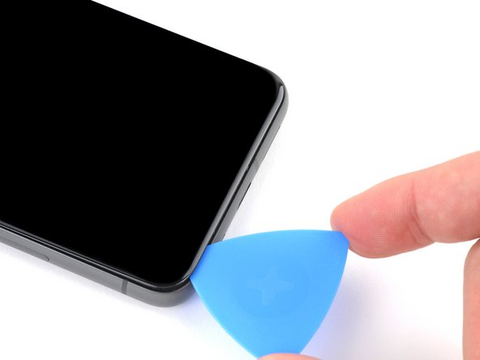
- Now you can carefully move and slide the opening pick along the bottom edge to loosen the adhesive.
- Place the pick in the bottom right corner to prevent the adhesive from sticking again.
Step #7. Give Heat On The Right Edge Of The Google Pixel 8 Pro
- Heat the right edge of the screen using a heated tool for about two minutes.
- Alternatively you can use a hair dryer, heat gun, or hot plate, but be careful because too much heat can damage the screen or battery.
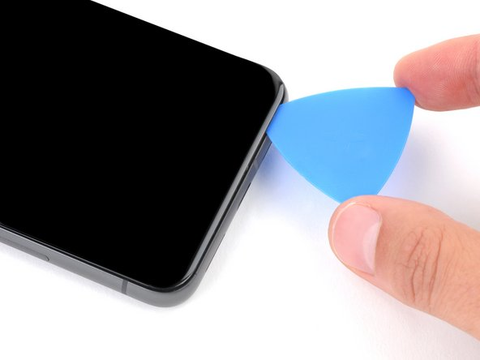
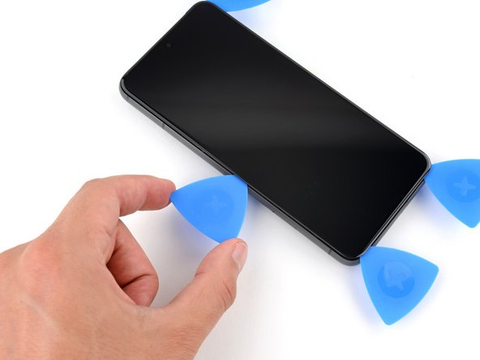
Step #8. Insert Second Opening Pick Into The Right Edge
- At this time put a new opening pick under the screen's bottom right corner.
- Move it towards the top right to loosen the adhesive on the screen's right side.
- Keep the pick in the top right corner to stop the adhesive from sticking again.
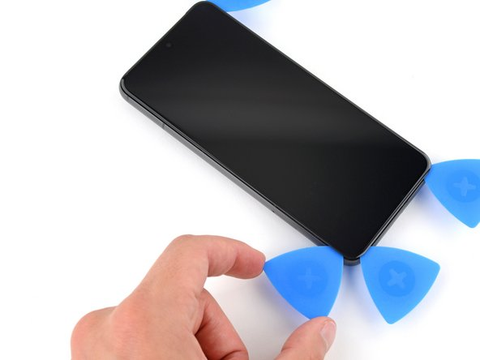
Step #9. Insert Third Opening Pick

Now once again insert another opening pick into the bottom edge.
- Place the third opening pick under the Google Pixel 8 Pro screen's bottom edge.
- Slide it to the bottom left corner gently.
- Keep the pick in the bottom left corner to stop the adhesive from sealing again.
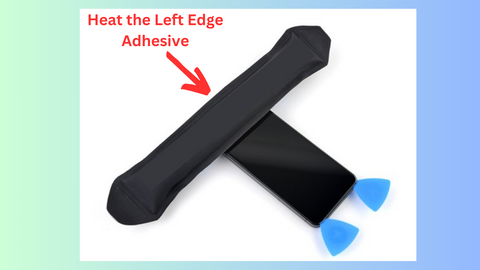
Step #10. Give Heat On The Left Edge Of The Google Pixel 8 Pro
Now place the heating tool on the left edge of the Google Pixel 8 Pro. Please don't give extra heat to any side of the phone.
Step #11. Separate The Left Edge Adhesive
- Here you will insert the fourth opening pick under the bottom left corner of the screen.
- Slide it gently to the top left corner to loosen the screen's left edge.
- Keep the pick in place at the top left corner to prevent the adhesive from sticking again.
Step #12. Give Heat To Top Edge Of The Screen
Now this is the last edge that has to separate from the frame.
- So give heat to the top edge of the Google Pixel 8 Pro Screen.
- Don't give more than two minutes to any side of the screen. As you know it can damage the screen or battery.
Step #13. Insert Fifth Opening Pick


- Put one more opening pick under the top part of the screen near the left corner.
- Move the pick towards the top right corner to loosen the adhesive holding the upper edge of the screen.
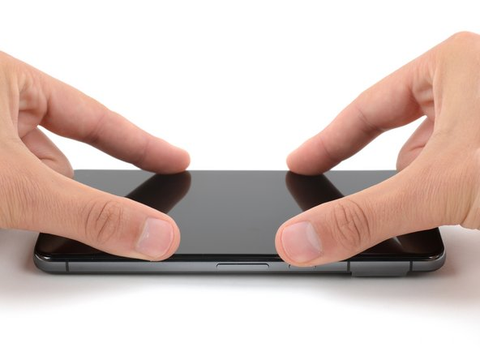
Step #14. Open The Screen Of The Google Pixel 8 Pro
At this you can easily
open the screen with the help of your finger.
- Lift the screen upward like a book.
- In case you feel the screen is still sticking leave the screen and give it heat once again. Then try lifting the screen again.
- Please remember not to separate the screen fully. The screen is still attached with screen connection cables.
Step #15. Hold Up The Screen With The Box
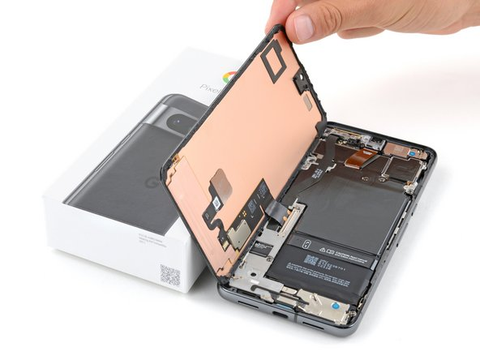
- Place a small box or stack of books on the left side of your phone to hold up the screen.
- Lift the right edge of the screen gently like opening a book.
- Make sure the screen is supported properly to avoid stressing the screen cable when you access it.
Step #16. Remove The Screen Cable Cover

- Now for separating the screen completely you need to remove the screen cover to disconnect the screen cable.
- So use a prying tool to pry up the screen cable cover.
- Pry up the screen cable cover from the right edge and then remove this cover.
Step #17. Remove The Screen Cable
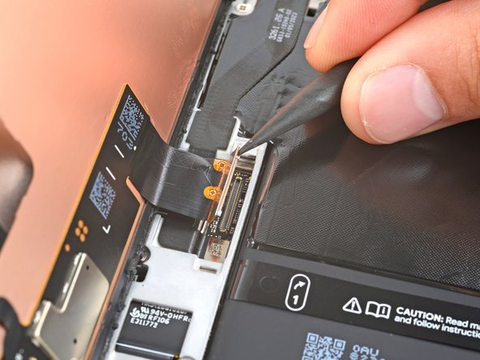
- Use a spudger to lift the top right corner of the screen's press connector.
- Carefully disconnect the cable by prying it up.
- Now remove the screen gently.
Step #18. Remove The USB‑C Cover Tape
From now we are moving to the steps that take us to Google Pixel 8 Pro Loudspeaker Replacement.
- To replace the Google Pixel 8 Pro loudspeaker you must remove the USB-C cover tape. Use the spudger's tip to lift the plastic shim above the USB-C port cover.
- Take off the shim and keep it aside or move it away to reach the USB-C port cover screws.
Step #19. Remove The USB‑C Port Cover
- During this repair you must remember to keep track of each screw and put it back where it came from.
- Although thePixel 8 Pro has Torx Plus screws and regular Torx bits work too. Just press down to avoid damaging the screws.
- Use a T3 Torx screwdriver to remove the two 5 mm-long 3IP Torx Plus screws that hold the USB-C port cover.
- Once removed take off the cover.
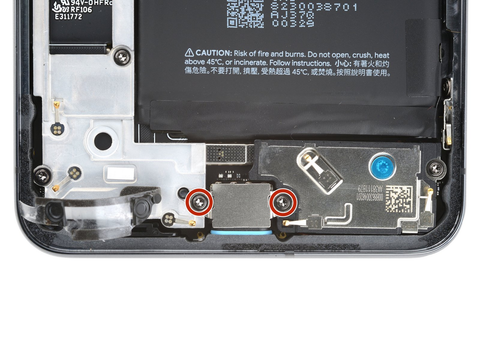
Step #20. Open The Google Pixel 8 Pro Loudspeaker Screw
It's time to open the Google Pixel 8 Pro loudspeaker screw.
- Use a T3 Torx screwdriver to unscrew the 5 mm-long 3IP Torx Plus screw holding the loudspeaker in place.
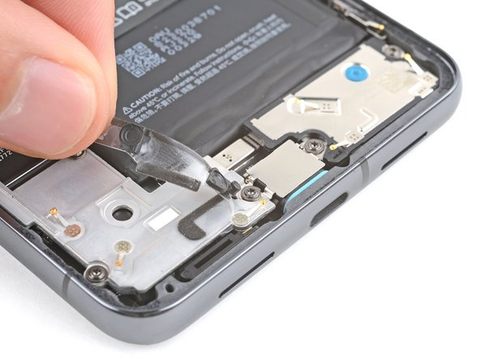
Step #21. Remove Google Pixel 8 Pro Loudspeaker
- Use the flat end of the spudger to gently pry between the bottom right corner of the loudspeakerand the frame.
- Carefully lift the loudspeaker with the spudger to remove it from its position.
- Once detached take out the loudspeakerfrom the Google Pixel 8 Pro Phone.
Step #22. Install The New Google Pixel 8 Pro Loudspeaker
- Now carefully install the new Loudspeakerinto the Google Pixel 8 Pro.
- angle the side of the speaker with the orange gasket down and slide it into the slot. Then press it firmly to lock it in.
- Make sure you have aligned and settled the loudspeakerin its place.
Step #23. Fasten The Screw Of The Loudspeaker

Now fasten the screw with the same screwdriver that you have used for unfastening.
Be sure not to extra tight the screw. Otherwise the screw may slip.
Step #24. Place The USB-C Port Cover
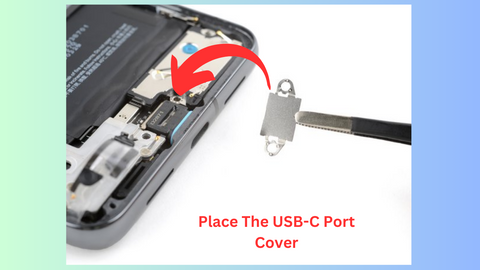
- Place the USB-C port cover.
- Make sure you place it correctly.
- Fasten the screws of the USB-C port cover.
Step #25. Reinstall The Plastic Shim
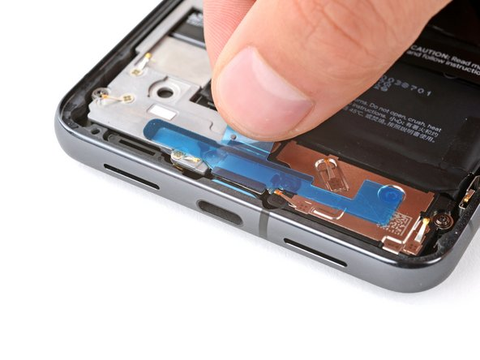
Here is how to put back the plastic shim that goes across the bottom of the midframe and loudspeaker. If you don't have a new one just put the old one back.
- Firstly take off the big rectangular liner from the shim.
- Put the shim in place so the small foam piece lines up with the bottom of the USB-C port cover.
- Press down firmly on the whole shim with the flat end of a spudger to make sure it's secure.
- Then take off any remaining liner.
Step #26. Reassemble The Screen

- To put yourGoogle Pixel 8 Pro screen back together get a new adhesive. Take off all the old adhesive from the frame and screen. Check carefully that there's no old adhesive left.
- Put the new adhesive sheet on the frame. Make sure to match the holes with how the phone is set up. Remove the big clear liner from the back to show the sticky part.
- Carefully stick the bottom of the adhesive onto the frame. Press gently to stick down the bottom corners.
- Then smoothly put the rest of the adhesive onto the frame. Make sure it sticks well.
- Remove the larger blue liner.
Step #27. Connect The Screen Cable
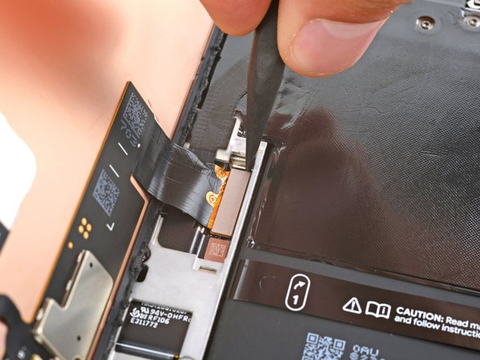
- It's time to connect the screen cable.
- Please place the cable on the right connection spot.
- Now press the cable to secure the connection.
- Feel the snug fit of the connection.
- Make sure not to push down in the middle. If the connector is not lined up correctly, the pins could bend and cause permanent damage.
Step #28. Place The Screen Cable Cover
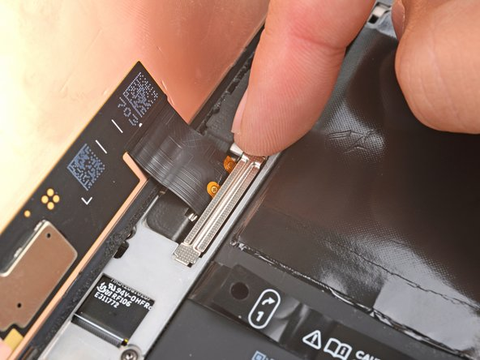
- Now cover the screen cable connection with its cover.
- Make sure to place it correctly and fit it in its point.
Step #29. Test The Google Pixel 8 Pro Loudspeaker Replacement
Now it’s a good time to check if your phone is working properly before sealing it. Turn it on temporarily and see if everything is okay. Then power it off again before moving forward.
Step #30. Place The Screen On The Frame
- Push the screen onto the frame firmly until you hear it click.
- Press on the edges of the screen to make sure it sticks with the new glue.
- If you want you can press all over the phone to make sure the glue sticks well.
Wrapping Up
Congratulations! You have successfully replaced the loudspeaker in your Google Pixel 8 Pro. However we hope that our guide has made the process easy for you. So you can now enjoy clear music and video call voices on your Google Pixel 8 Pro once again.