As an iPhone user, you have probably experienced the frustration of a damaged camera lens. Whether it is a scratch, a crack, or a completely shattered lens, it can significantly impact your ability to capture those precious moments. While you might be tempted to take your phone to an Apple Store or a third-party repair shop, replacing the camera lens yourself can be a rewarding DIY project.
The process of replacing an iPhone camera lens may seem difficult, but with the right tools, patience, and a little guidance, it can be a manageable task. By following a step-by-step guide and taking your time, you can save yourself some money and extend the life of your device.
Here I shall provide you with a detailed guide on how to replace your iPhone 15 Pro camera lens. I shall cover everything from the tools you shall need to the steps involved in the repair process.
Tools Needed

Before you start the replacement process, ensure you have the following tools:
- Phillips head screwdriver: This is essential for removing the screws that hold the phone's back panel in place.
- Suction cup: This will help you lift the back panel without damaging it.
- Plastic spudger or opening tool: This will be used to pry the back panel away from the phone's frame.
- Tweezers: These will be helpful for removing the old camera lens and inserting the new one.
- New camera lens: Make sure you purchase a genuine replacement part from a reputable source.
Tips and Tricks
- Work in a clean environment: A clean workspace will help prevent dust and debris from getting into your phone.
- Be gentle: Avoid using excessive force when removing or inserting components.
- Disconnect the battery: Before starting, disconnect the battery to prevent accidental power-on.
- Take your time: Rushing through the process can increase the risk of damage.
Step-by-Step Guide to Replacing Your iPhone 15 Pro Camera Lens
Preparation:

- Gather your tools: Ensure you have all the necessary tools: a Phillips head screwdriver, suction cup, plastic spudger, tweezers, and a new camera lens.
- Find a clean workspace: A clean environment will help prevent dust and debris from entering your phone.
- Discharge your phone: Fully discharge your iPhone's battery to minimize the risk of electric shock.
Disassembly:

- Turn off your iPhone: Press and hold the side button until the power off slider appears and slide it to the right.
- Remove the SIM card: Use the SIM eject tool to remove the SIM tray.
Heat the Back Panel:

Use a heat gun or hair dryer to evenly heat the back panel. This will soften the adhesive that holds it in place. Be careful not to overheat the panel, as this could damage it.
Lift the Back Panel:

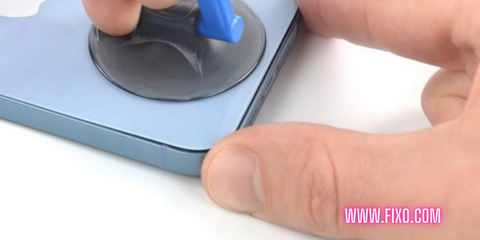
Place the suction cup near the bottom of the back panel and gently pull upward. Use the plastic spudger to pry around the edges of the panel, releasing it from the adhesive. Work slowly and carefully to avoid damaging the panel.
Removing the Camera Lens:

Use the tweezers to carefully disconnect the battery connector. This will prevent accidental power-on during the repair process.
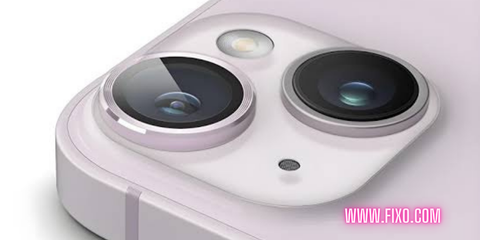
Locate the camera module, which is usually located near the top left corner of the phone. Use the tweezers to gently remove it from the phone. Carefully remove the old camera lens from the camera module. Use the tweezers to gently pry it off if necessary.
Install the New Lens:

Place the new camera lens in the designated position on the camera module and gently press it into place. Ensure that it is securely seated.
Carefully reattach the camera module to the phone, ensuring that it is properly aligned. Carefully reconnect the battery connector, ensuring that it is properly seated.
Replace the Back Panel:

Align the back panel with the phone's frame and gently press it into place. Use the plastic spudger to ensure that the adhesive is properly sealed around the edges of the panel.
Replace the SIM card: Insert the SIM card back into the tray and reinsert the tray into the phone.
Turn on your iPhone: Press and hold the side button until the Apple logo appears.
Testing the Camera:

Open the Camera app: Once your iPhone has booted up, open the Camera app.
Test the camera: Take some photos and videos to ensure that the new camera lens is functioning properly. Check for any focus issues, image quality problems, or other abnormalities.
Additional Tips:
- Work in a well-lit area: This will help you see the components more clearly.
- Take your time: Rushing through the process can increase the risk of damage.
- Be gentle: Avoid using excessive force when removing or inserting components.
- Use a heat gun or hair dryer: This will help soften the adhesive that holds the back panel in place, making it easier to remove.
- Be cautious with the battery connector: Avoid touching the exposed contacts of the battery connector, as this could cause a short circuit.
By following these steps and taking your time, you can successfully replace your iPhone 15 Pro camera lens and save yourself some money.
Final Verdict
Replacing your iPhone 15 Pro camera lens can be a rewarding DIY project, allowing you to save money and extend the life of your device. However, it requires patience, precision, and a careful approach to avoid damaging your phone.
By following the steps outlined in this guide and taking your time, you can successfully complete the repair and enjoy the benefits of a fully functional camera. Remember to gather the necessary tools, work in a clean environment, and exercise caution throughout the process.
While replacing the camera lens yourself can be a satisfying accomplishment, it is important to assess your technical skills and comfort level before attempting the repair. If you are unsure about your abilities or encounter any difficulties, it may be best to seek professional assistance from an authorized Apple service provider or a reputable repair shop.

