Change the display on your Samsung Galaxy A70 wholly by yourself. All you need is a Samsung Galaxy A70 DIY Replacement Kit, and some time. Follow the instructions step by step, and you will soon be able to enjoy a working display again.
1) Switch off your device

To get started turn off your Samsung Galaxy A70 completely to avoid damaging it during the repair. Press the on/off button for about three seconds until "Switch off" appears then confirm it by taping on it.
2) Extract SIM Card Tray
Insert SIM extractor into the small hole of the SIM drawer, which is on the left side of the phone. Exert a slight pressure and SIM drawer will eject himself.
3) Heat the back of the phone

To remove the back cover you will need a heat gun or hair dryer to soften the glue that holds it. Use a hairdryer or a heat gun to heat the back of the phone for 2 to 3 minutes to soften the glue that holds it. If you feel the resistance in the next steps do not hesitate to heat the back for a few more minutes.
4) Remove Back Cover
Insert the spatula between the rear window and the frame to create a slight opening and then insert a pick to take over. Gently slide the pick all the way around the rear window (Try not to stick the pick in too far because that could damage the flex cables). Now you can lift the back of the phone.
5) Remove internal chassis
Unscrew the 14 screws using the Philips screwdriver and start unclipping the internal frame form the rest of the phone by inserting spatula into the first corner. Unclip the entire top of the phone leveraging the spatula. Continue the operation on all sides of the A50. Then finally, you can gently separate the internal chassis from the rest of the Samsung Galaxy A70.
6) Disconnect the motherboard
Battery contact
Get the nylon spatula from the kit, and use it to disconnect the battery.
Front camera
Using the nylon spatula unlock the front camera sheet and then remove it.
Remove bonding web
Use the same spatula to disconnect the bonding mat on the motherboard. Then disconnect the interconnection cable as well.
Extract the motherboard
Use the Philips screwdriver to unscrew the yellow circled screw that is holding the motherboard to the chassis. You can now separate the motherboard from the chassis. The Samsung Galaxy A70 motherboard is partially disassembled.
7) Remove internal speaker
Use the flat screwdriver to displace and remove the internal speaker.
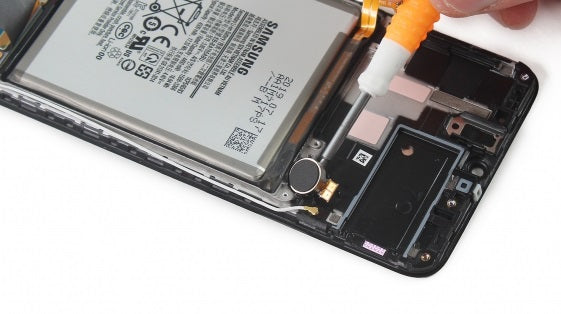
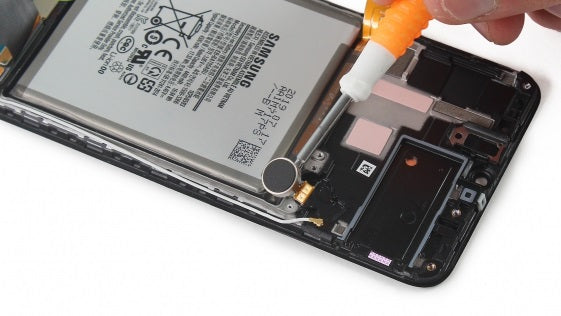
8) Remove the vibrator
Use the same flat screwdriver to dislodge and extract the vibrator.
9) Heat the front

Flip your Galaxy A70 to heat the front side of the battery for a few seconds to soften the glue that holds the battery. Watch out not to heat the battery directly. Also do not overheat the center of the LCD for a long time because you may damage it.
10) Remove battery
Flip the phone again and gradually slide the flat wider spatula under the battery to take it off.
11) Remove LCD tablecloth
Use nylon spatula to unplug the tablecloth from the screen. Use it again to disconnect the interconnect cable from the charging connector.
12) Remove charge connector
Use the Philips screwdriver to unscrew the 2 screws circled in yellow. Then use gently remove the charge connector assembly.
13) Remove interconnection cable
Now one of the last things you will do is to gently pull out the interconnection cable with clamp and extract it from the screen frame.
14) Reassemble with the new screen

Congratulations your A70 screen is completely disassembled. Now take your new screen and reassemble your Galaxy A70 by following this guide in reverse order, and then test everything up to make sure you did everything properly.
Test everything
Congratulations, you changed your Samsung Galaxy A70 screen. Now just test a few things to make sure everything is working properly:
-Test the brightness of the display.
-Test the touchscreen, select an app, and drag it all around the display. If it is following your finger everything is fine.


