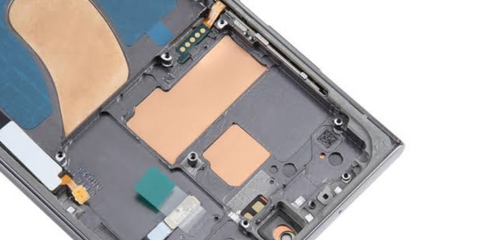
Do you ever have trouble hearing people clearly on your phone calls on your Samsung Galaxy S23?
If so, you are not alone! Many people who own this phone have reported problems with the ear speaker. This can make it frustrating to speak on the phone and can also make it hard to hear music. The good news is that you can fix this problem by replacing the ear speaker in the Samsung Galaxy S23. Here I shall guide you about the steps on how to do it yourself, so you can get back to enjoying clear calls and great audio on your phone.
Common Issues
Before we start the replacement process, it is essential to understand the common issues that users may face with their ear speakers. Some of the most common problems include:
- Low volume: The ear speakers may produce low volume, making it difficult to hear the caller.
- Echoing: The ear speakers may produce echoing sounds, which can be distracting and affect the overall audio quality.
- No sound: In some cases, the ear speakers may not produce any sound at all, making it impossible to hear the caller.
These issues can be caused by a variety of factors, including damage to the ear speakers themselves, software glitches, or even physical damage to the device. Regardless of the cause, replacing the ear speakers can be a simple and effective solution to these problems.
Tools Required

To replace the ear speakers in Samsung Galaxy S23, you will need the following tools:
- Screwdriver: This screwdriver is used to remove the screws that hold the ear speakers in place.
- iSclack opening tool: This tool is used to carefully pry open the device and access the ear speakers.
- Suction cup: This tool is used to lift the screen and provide additional leverage when removing the ear speakers.
- Fine-tipped curved tweezers: These tweezers are used to carefully remove the ear speakers and any remaining components.
- iGadget 5-piece opening picks: These picks are used to carefully pry open the device and access the ear speakers.
- Black spudger: This tool is used to carefully remove any remaining components and ensure that the ear speakers are properly seated.
Step-by-Step Guide to Replacing Your Samsung Galaxy S23 Ear Speaker
Replacing the ear speaker in your Galaxy S23 might seem difficult, but with these detailed instructions, you shall be back to enjoying crystal-clear calls. Here is the breakdown of each step:
1. Power Down and Prep Your Phone

- First things first, turn off your phone completely. This helps prevent accidental electrical shorts during the repair process.
- Once powered down, remove any SIM cards and SD cards that might be in your phone. This extra step ensures they don't get damaged while you work on your device.
2. Carefully Open the Phone

- We shall be using a tool called an iSclack to gently pry open the phone. This tool helps distribute pressure evenly, minimizing the risk of cracking the screen or damaging other components.
- Be mindful: Don't force the phone to open. If it feels stuck, apply gentle, even pressure with the iSclack.
3. Separate the Screen

- Here is where the suction cup comes in use. Place it firmly on the screen and use it to create some lifting power. This will give you a better grip when carefully removing the screen from the rest of the phone.
- Remember: Be gentle! The screen is one of the most delicate parts of your phone. Slowly and carefully lift the screen and place it in a safe location away from your work area.
4. Isolate and Remove the Old Ear Speaker

- Now we need some precision. Grab your fine tipped curved tweezers and carefully locate the old ear speaker.
- Important: Avoid touching any surrounding components with the tweezers. This could damage delicate circuits and render your phone inoperable.
- Once you have identified the ear speaker, use the tweezers to gently remove it from its spot in the phone.
5. Clear Out Any Remaining Components (Optional)
- In some cases, there might be additional components like connector contacts that need to be removed before installing the new ear speaker.
- If you see any such components, use the black spudger tool to carefully detach them. Just like before, be extra cautious not to touch any surrounding parts with the spudger.
6. Welcome the New Ear Speaker

- Here is the exciting part! Take your new ear speaker and carefully place it in the designated spot on your phone.
- Double-check: Make sure the new speaker is properly seated and aligned with the designated spot before moving on.
7. Putting it All Back Together

- Now it's time to reassemble the phone. Use the iGadget 5-piece opening picks to carefully put everything back in its place.
- Take your time: Ensure all components click into place securely and that no wires are pinched or misplaced.
8. Testing the New Ear Speaker

- With everything reassembled, it is time to test your phone! Power on your phone and make a call or listen to some music.
- Adjust the volume to a comfortable level and listen for clear audio. Is there any echoing or distortion? If everything sounds crisp and clear, congratulations! You have successfully replaced your ear speaker.
Final Verdict
Fixing the ear speaker on the Samsung Galaxy S23 might seem tricky at first, but with these instructions and a little care, you can do it yourself!
Just follow the steps we talked about, and you shall be back to enjoying clear calls and great sound on your phone in no time. Remember to be gentle when opening your phone and take your time putting it back together. If you are ever unsure, it is always best to consult a professional. But with a little practice, you might surprise yourself with what you can fix!

